-1.png?width=200&height=51&name=LM_NuBlu_Horiz_Hi%20(1)-1.png)
This article explains how to create a pricing rule that applies to a select date and time. This functionality is useful when creating a limited time promotion or when you observe variances in demand across the week. Varying price to meet demand is critical for maximizing revenue.
InstructionsThis is a step-by-step guide on how to create a temporary pricing ruleset.
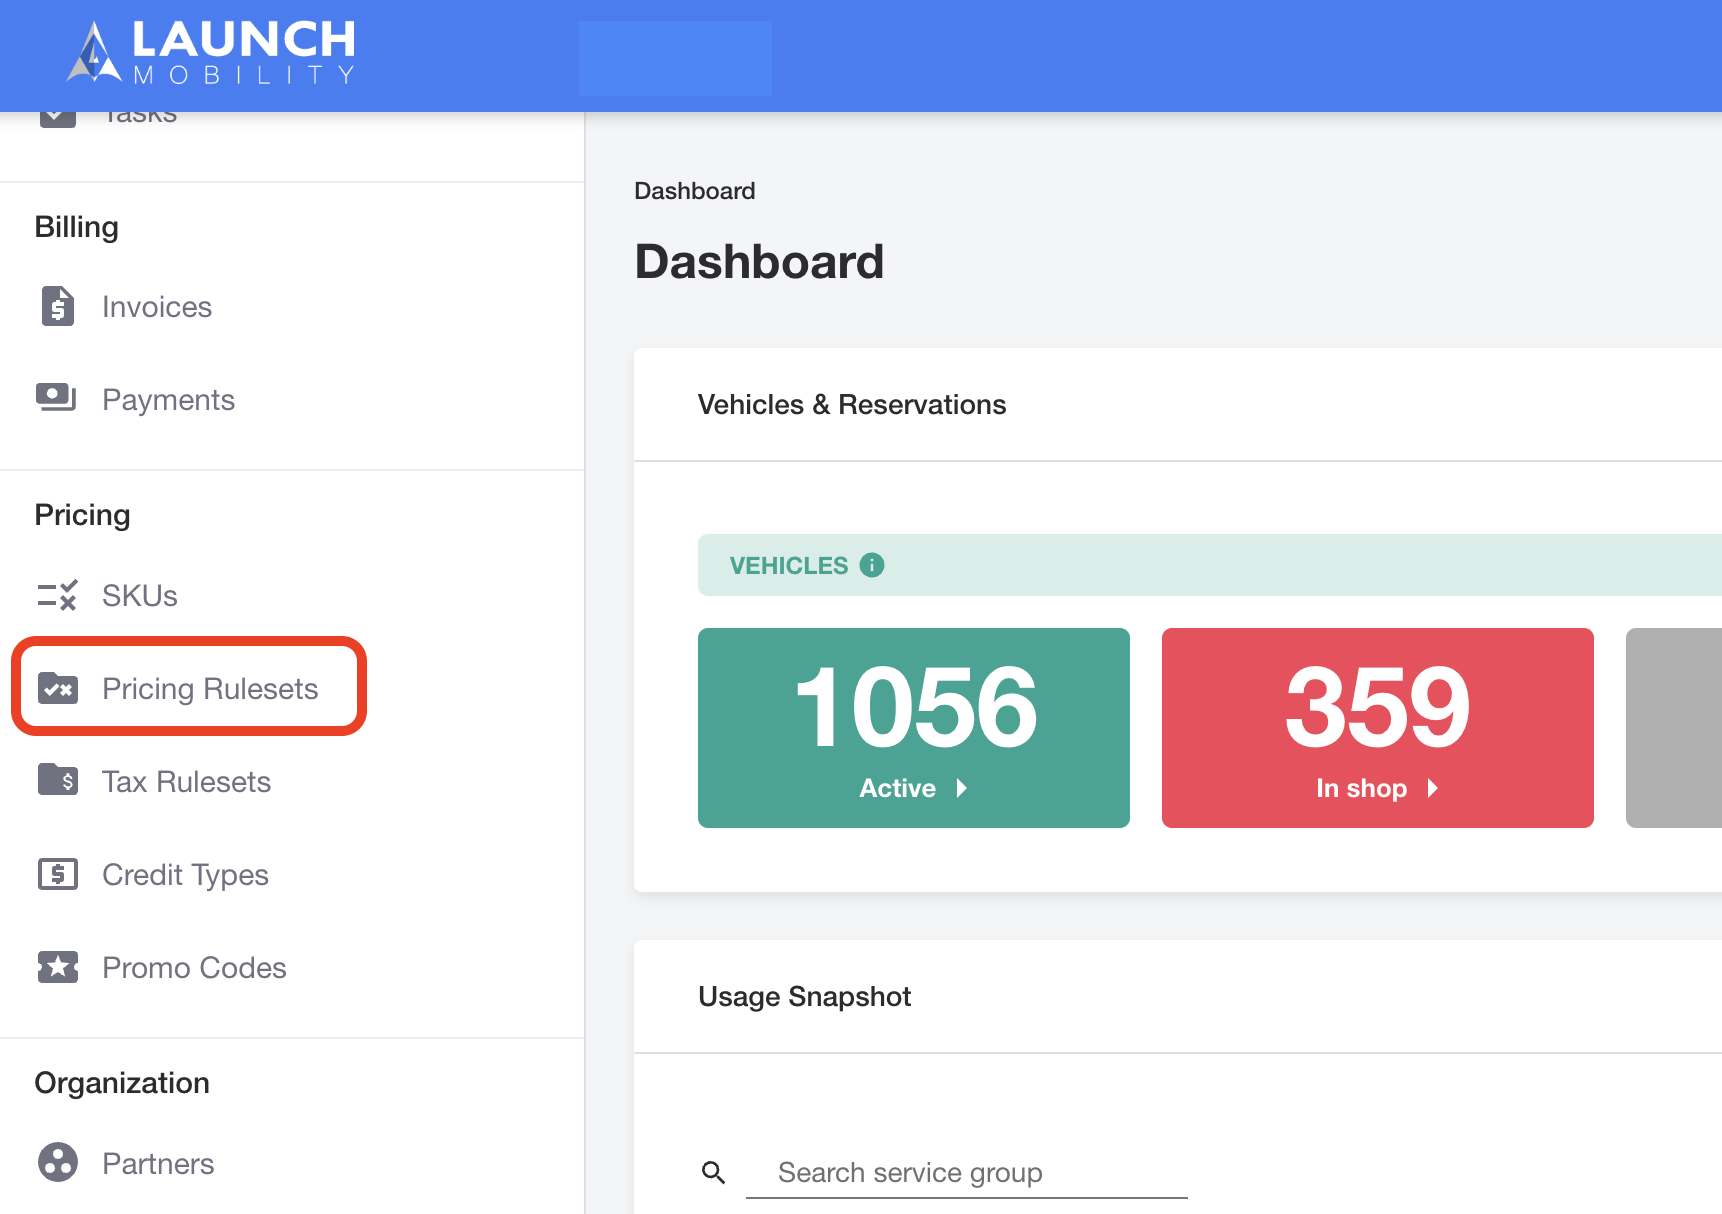
- In Service view, scroll down the menu on the left side to “Pricing” and select “Pricing Rulesets”.
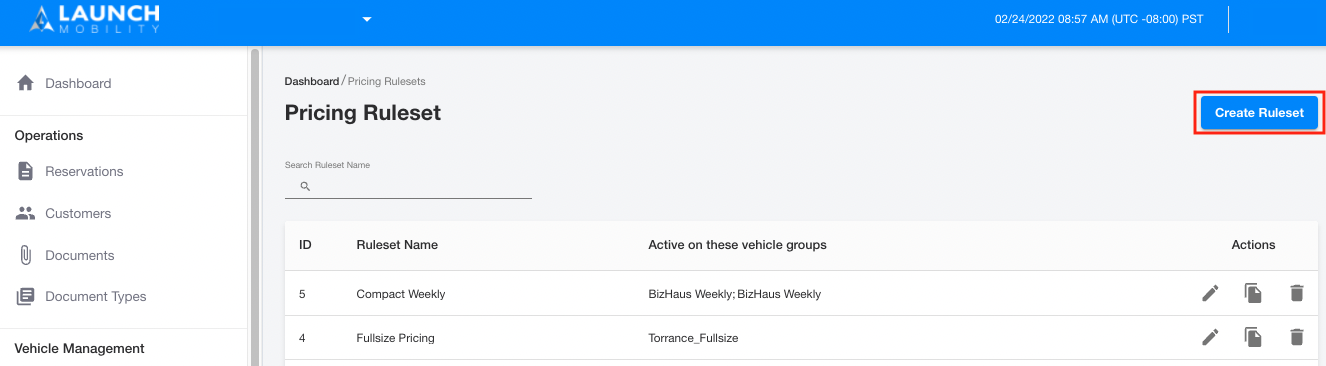
2. Click the “Create Ruleset” button at the top right corner.
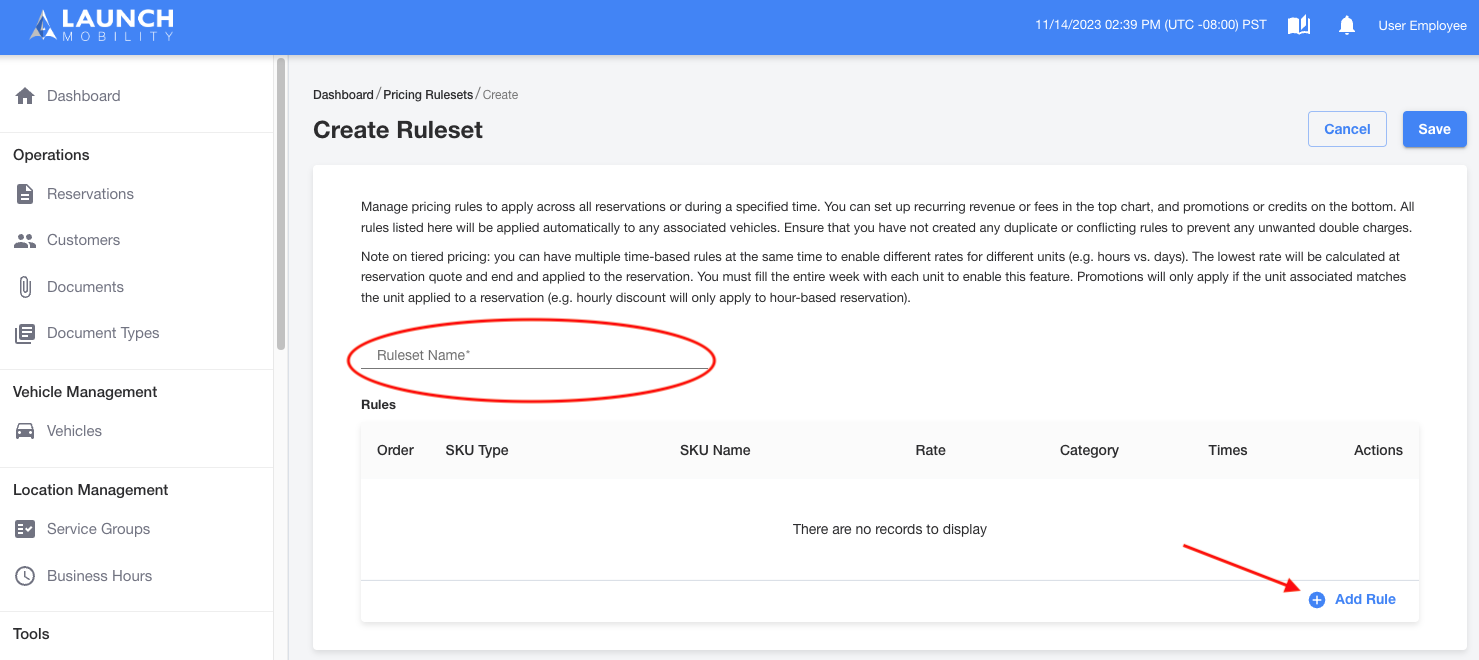
3. Create a pricing ruleset name (could be any name). Then click the “Add Rule” button.
Creating Pricing Rules as Revenue vs. Promos
You can create time-based pricing as either a typical revenue rule or as a promotion.
- Choose a promo when you have a discount that you want to subtract from a standard revenue rule for specified periods of time. The promo will show up as a discount on a customer’s invoice only during the selected period.
- Choose a revenue rule when you prefer to have the base price vary by time of the week. Be sure that your revenue rules completely cover all times of the week.
4. At this point, the “Create” pop-up window will appear. You’ll be able to select the type of ruleset you’d like, add a SKU and enter a rate. You can also set the duration of your ruleset here. There are two toggle switches where you can specify whether you’d like to run this all of the time. If not, you can select specific dates and times on this screen.
Note: if the item you’re looking for is not in the list, you will need to add a new SKU. How to add a SKU in Mission Control
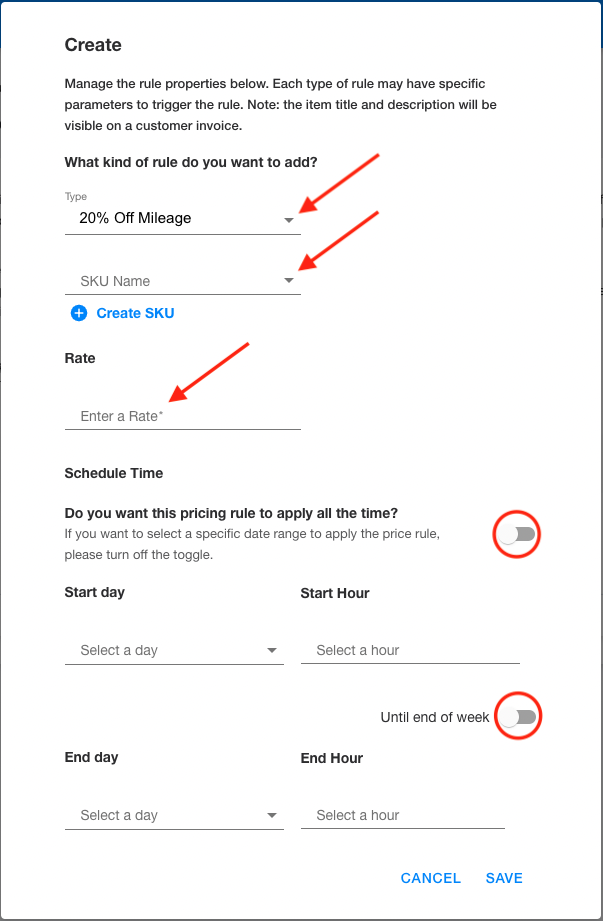
5. Select the dates and times that you want this pricing rule set to apply. Then click the “Save” button on the bottom right corner.