-1.png?width=200&height=51&name=LM_NuBlu_Horiz_Hi%20(1)-1.png)
This article explains how to create an optional pricing rule. If your app supports it, this is the way to create pricing rules for add-on products and services.
InstructionsThis is a step-by-step guide on how to create an optional pricing ruleset.
-
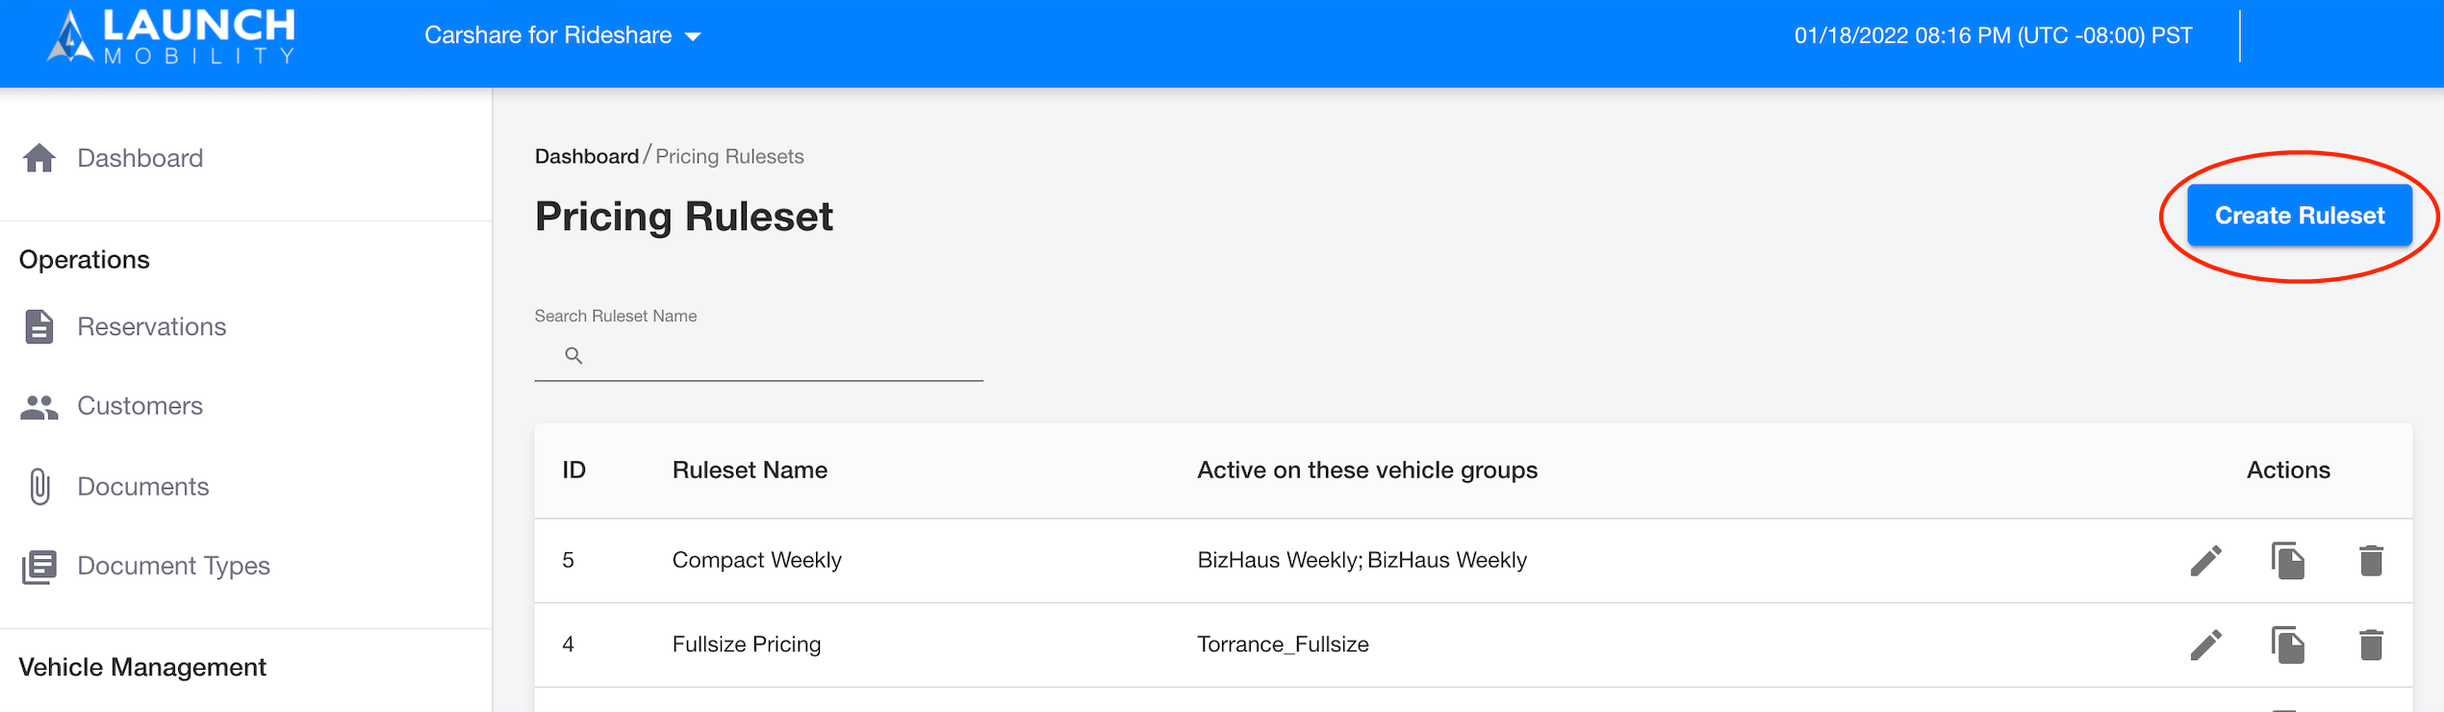
Within Mission Control, when viewing the navigation bar on the left, scroll down to “Pricing” and select “Pricing Rulesets”.

-
Click “Create Ruleset” button at the top right corner.
-
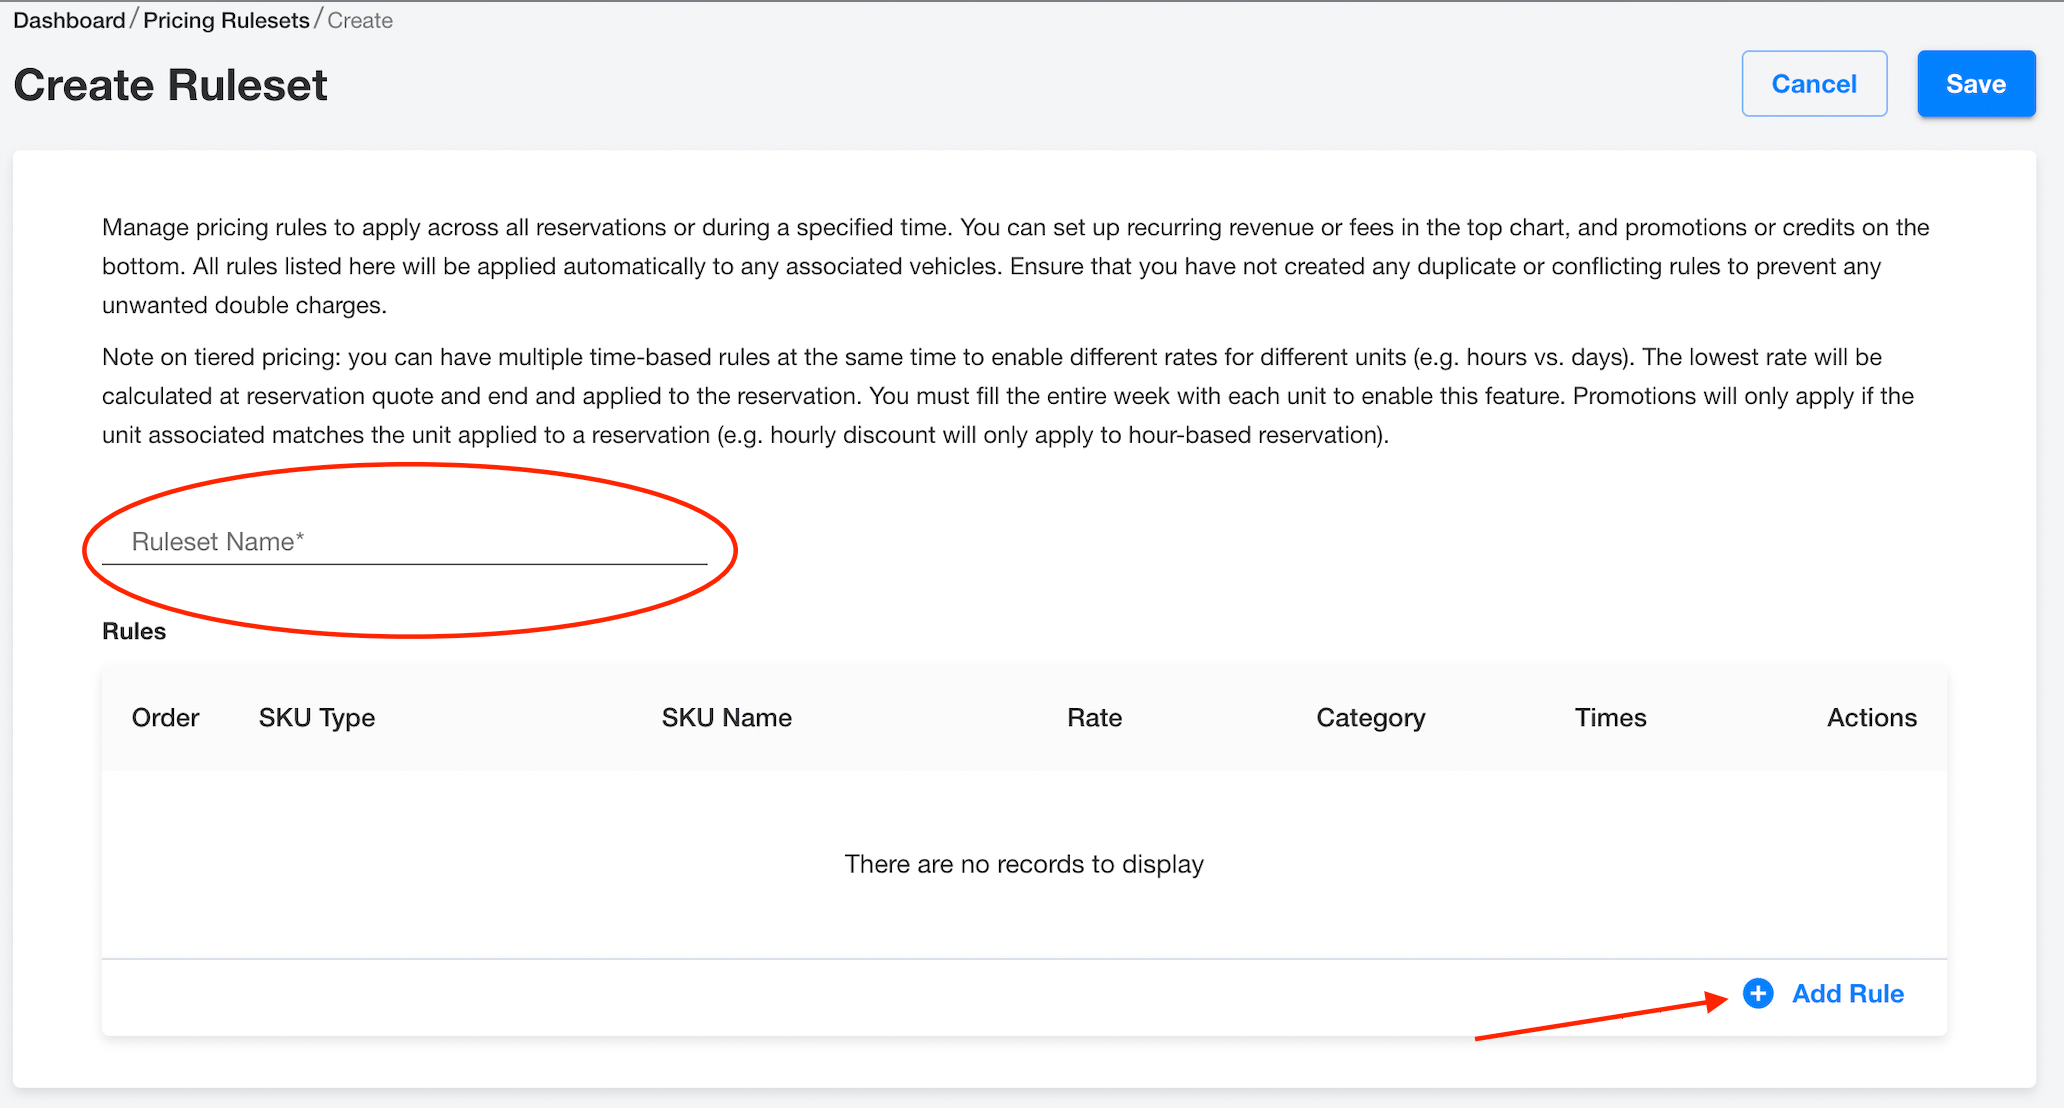
Create a pricing ruleset name (could be any name). Then click the “Add Rule” button.
-
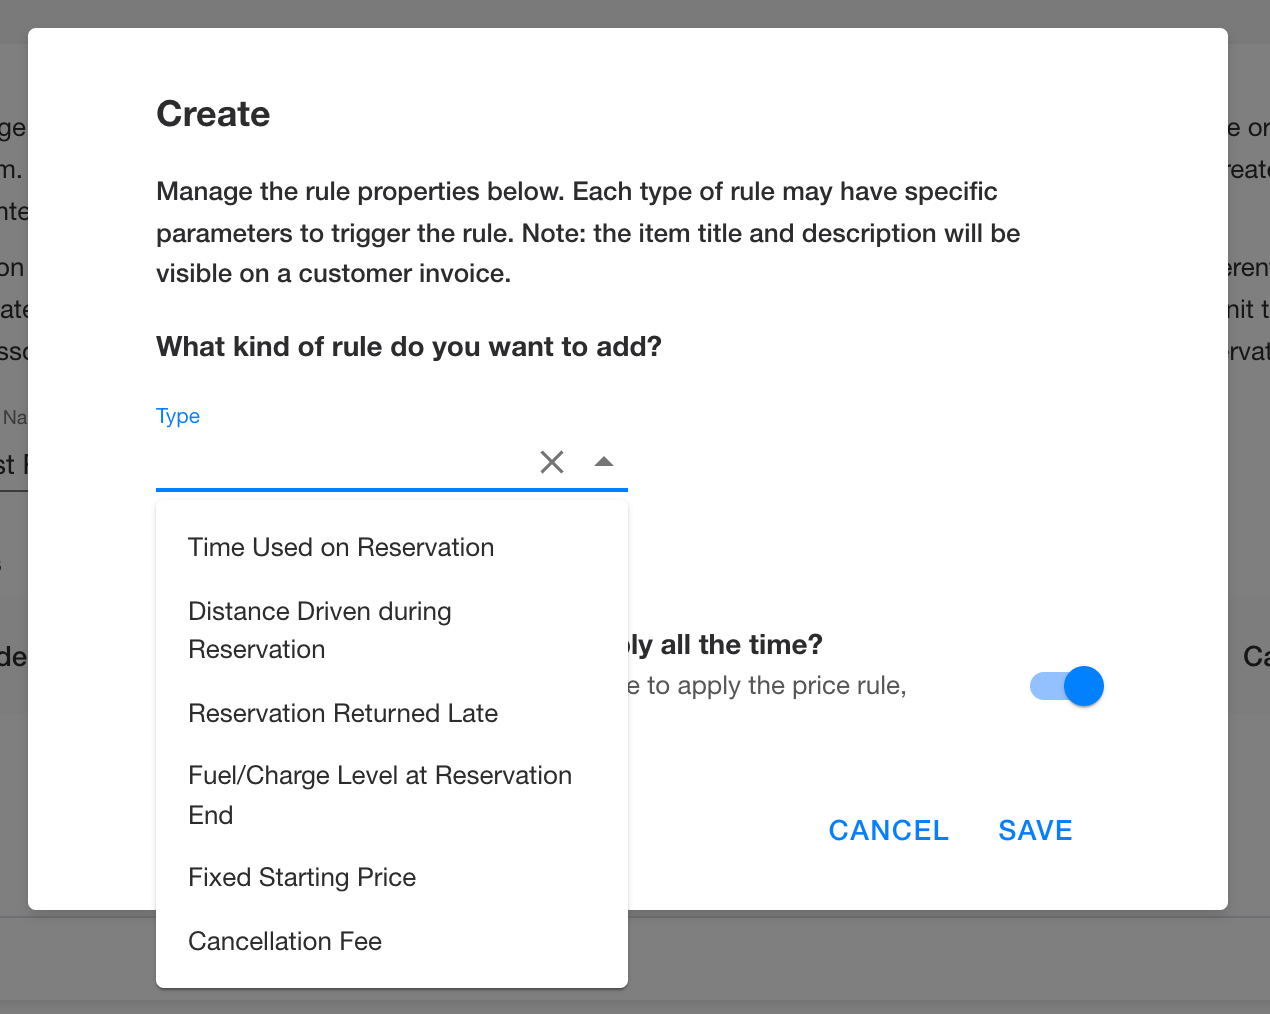
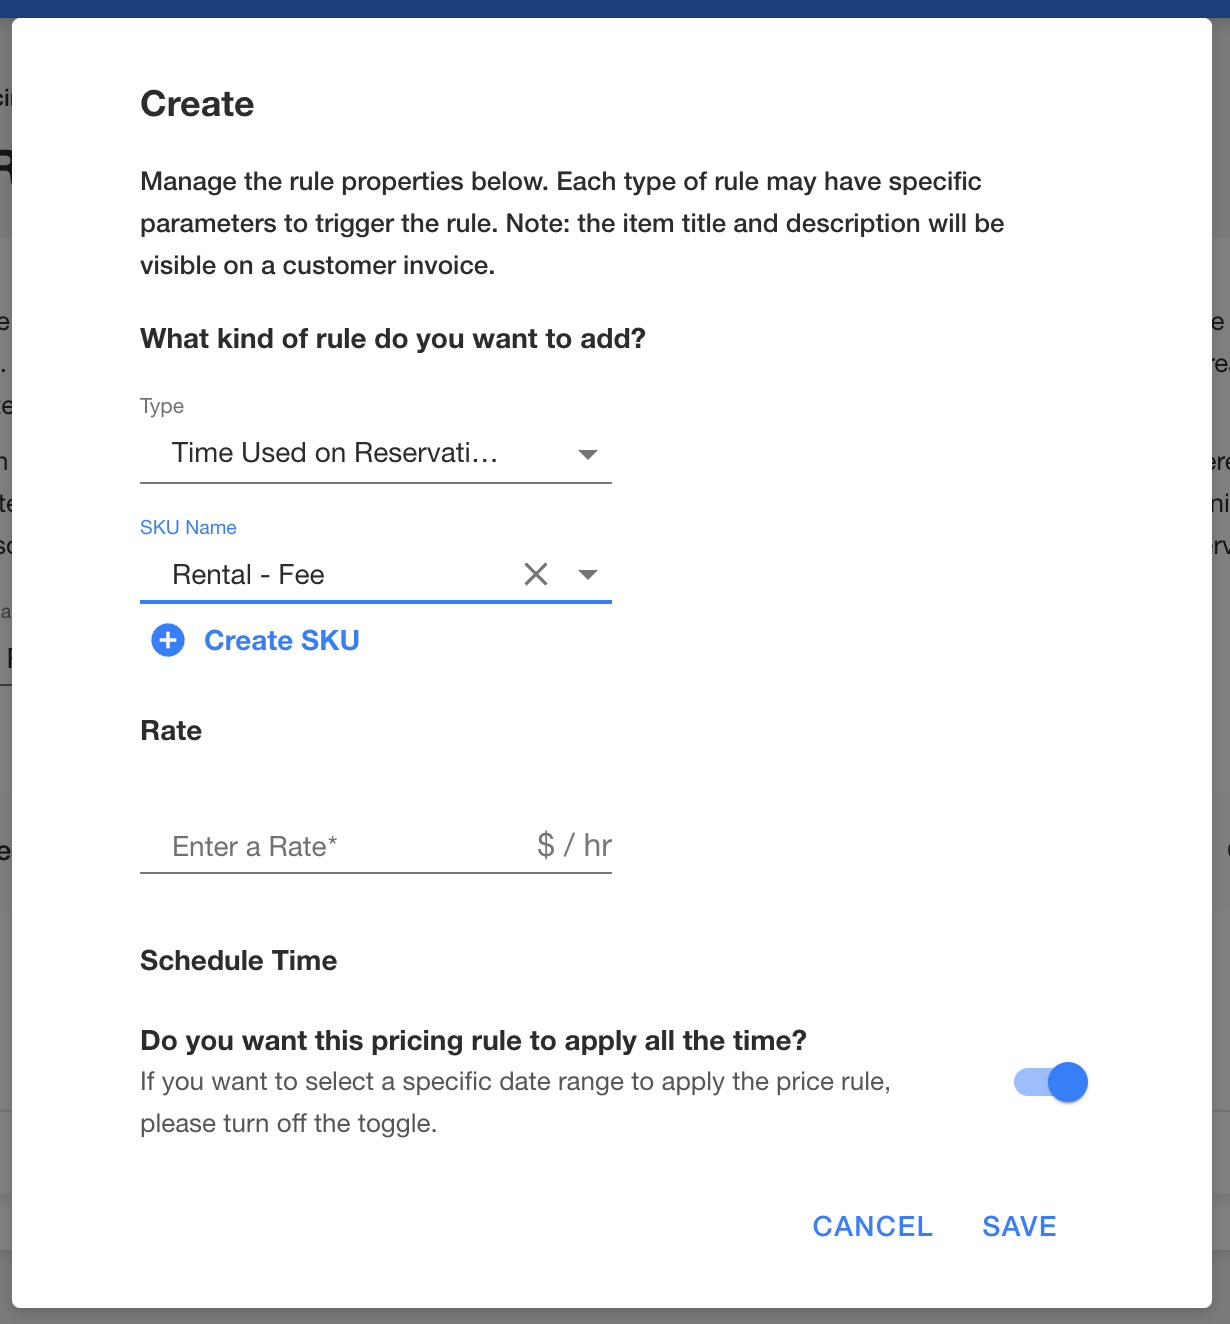
Once you click the “Add Rule” button, this pop-up will appear. You’ll be asked which type of rule you’d like to add. Select an item from the drop down menu.
-
Once you select an item from the drop-down, you will be able to add a SKU.
Note: If the item you’re looking for is not on the list, you’ll need to add a new SKU (you can find instructions on how to create a SKU here.
The Rate is the price for your product or service. In the ‘Schedule Time’ section, you have the option of applying this pricing rule all the time or setting up a date and time range to apply the pricing. Follow the prompts to setup up a range of time for the pricing rule by tapping the “Schedule Time” toggle to OFF. Once you’ve selected your options, click “Save”.
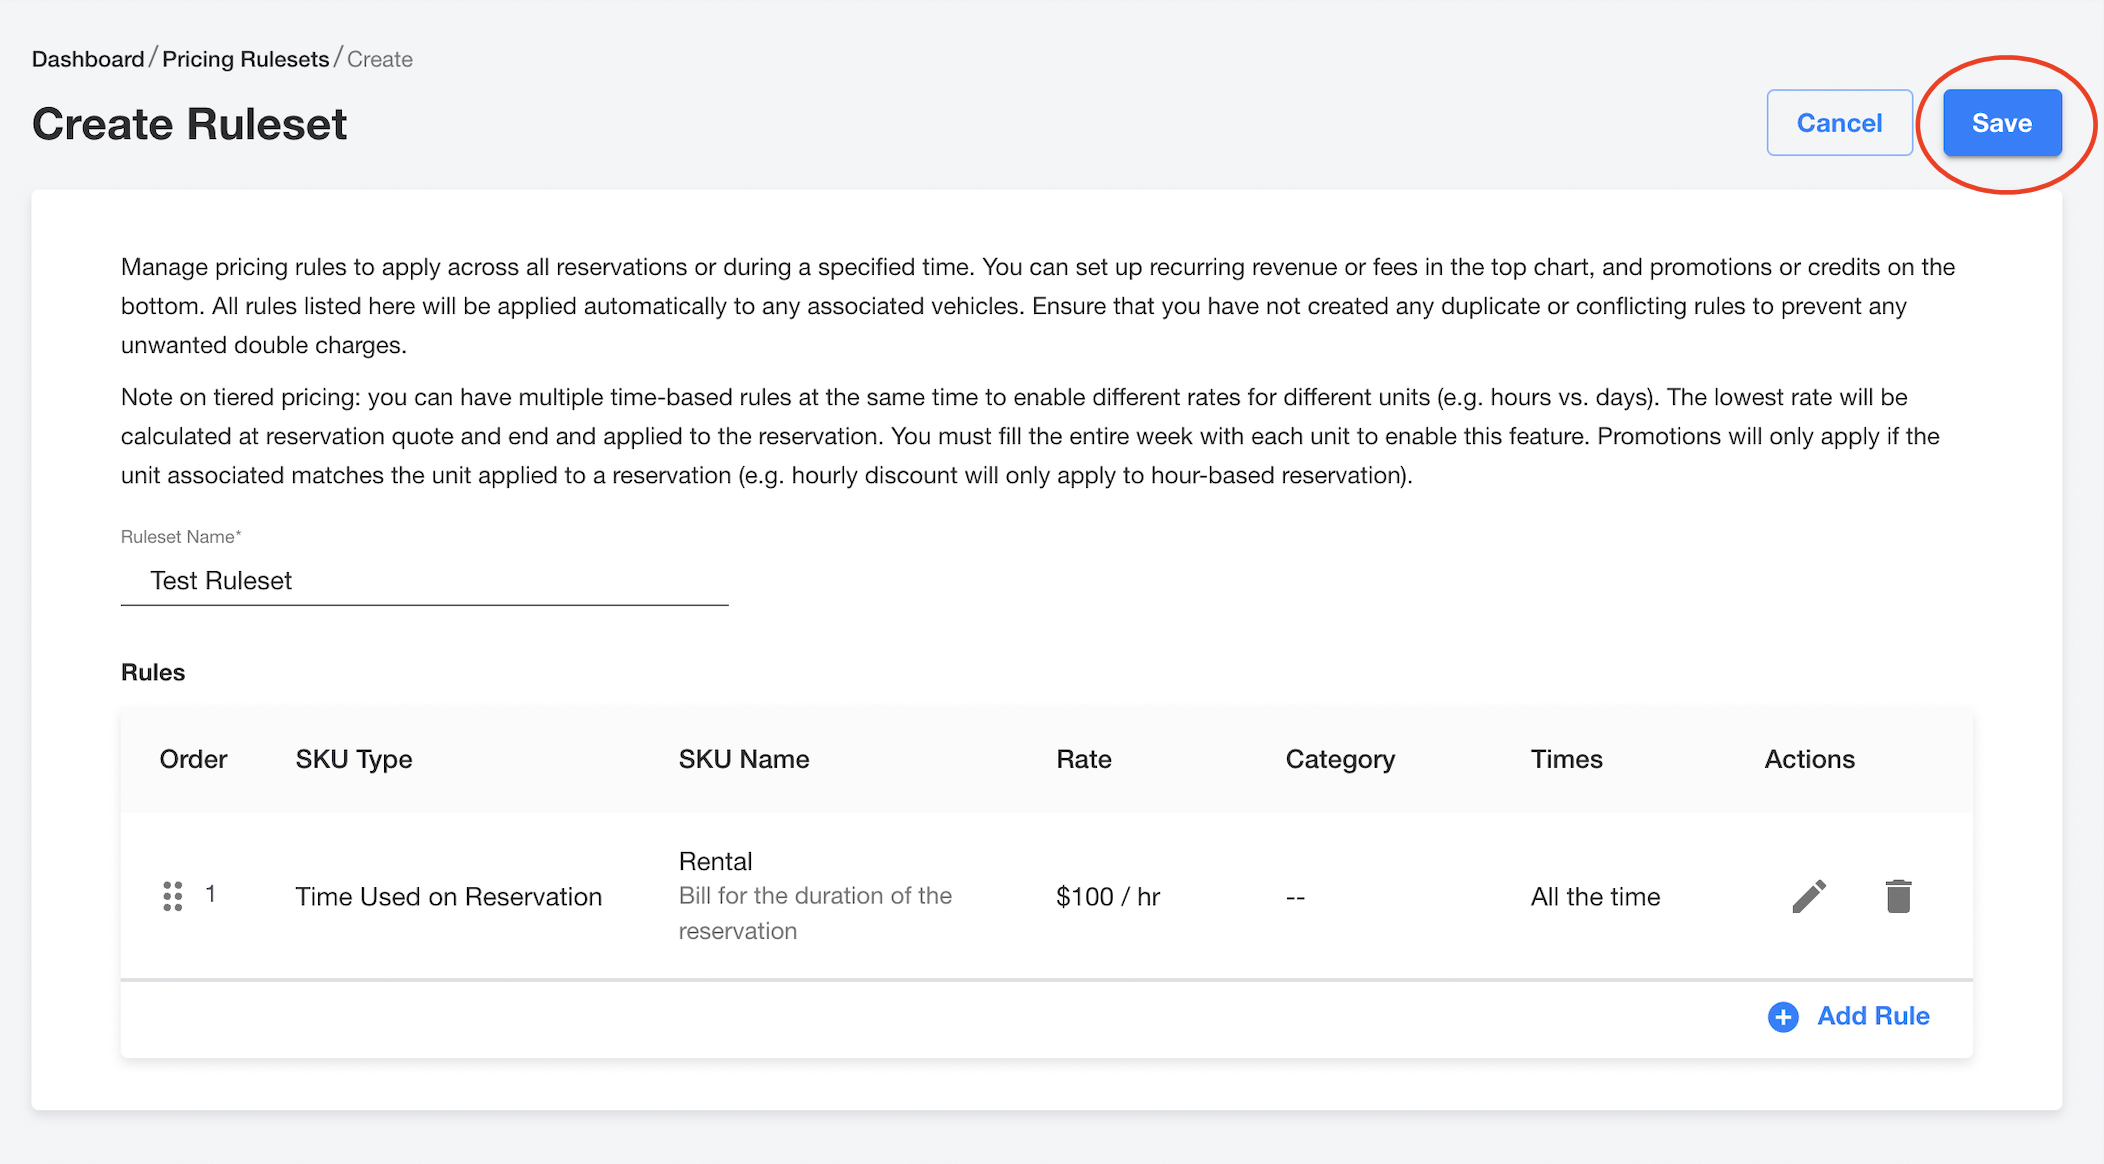
Click “Save” on the Create Ruleset screen to save the newly created Pricing ruleset.