-1.png?width=200&height=51&name=LM_NuBlu_Horiz_Hi%20(1)-1.png)
With rapidly changing inventories, bulk uploading allows your organization to add multiple vehicle listings simultaneously, saving time and effort compared to manual entry. Bulk vehicle uploading is an efficient way to manage a large inventory of vehicles with the ability to scale with your business.
Before starting this process, you will need to make sure you have created vehicle types for all of the vehicles you are about to import. Please take note of your vehicle type's ID number and fleet ID number. These will need to be referenced during this process. To gather this information, select Vehicle Types and Fleets from the navigation menu.
Instructions- Log in to Mission Control http://control.launchmobility.com
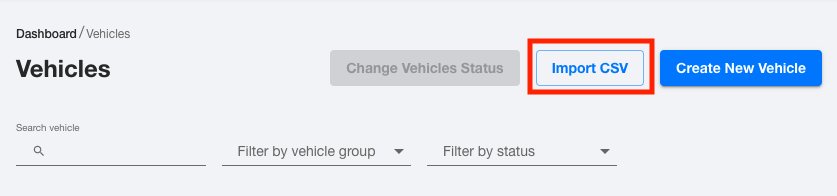
- Select “Vehicles” from the sidebar navigation.
If your organization has multiple services, confirm you are in the ‘owner’ view.
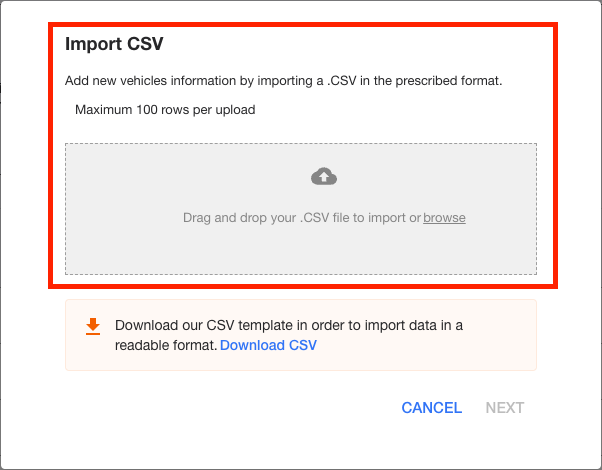
- Click “Import CSV” to begin importing your data.
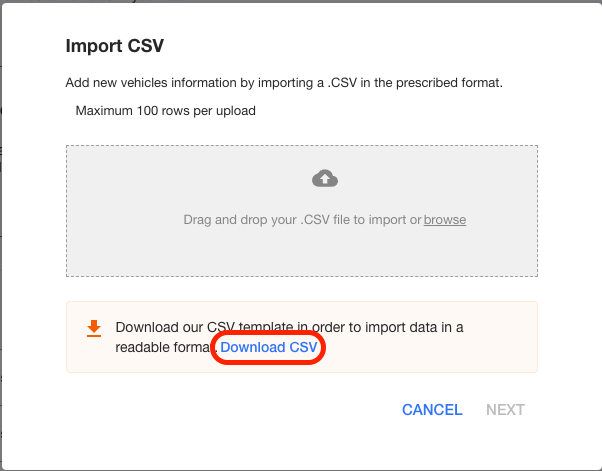
- Click "Download CSV" to download the template to import your data in a readable format.
- Open the .csv file with Microsoft Excel and input the following data into each field for each vehicle type per row:
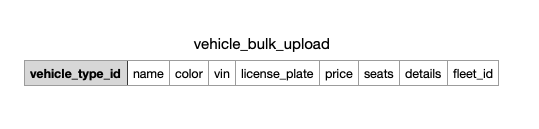
CSV Template Definitions
- VEHICLE_TYPE_ID - the vehicle type ID associated with the vehicle
- How to locate the vehicle type ID: Navigate to “Vehicle Type” tab from the side navigation bar and locate the “ID” column that corresponds to the vehicle type in the system.
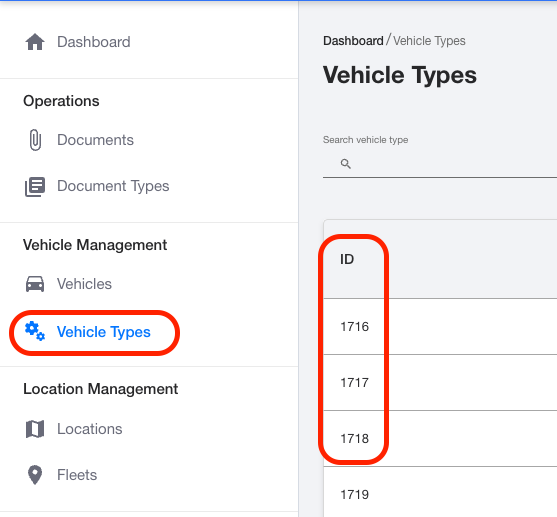
Not seeing a vehicle type for a vehicle? Create a new vehicle type following the steps in this article: [How to create a vehicle type](../../Setting_up_Mission_Control/Setting_Up_your_Fleet/How_to_Create_a_Vehicle_Type.md
- NAME - The name of the vehicle name that your drivers will see when reserving the vehicle.
- COLOR: vehicle exterior color
- VIN: vehicle identification number
- LICENSE_PLATE: vehicle license plate
- PRICE: The value of the vehicle
- SEATS: The number of seats available in the vehicle
- DETAILS: Vehicle description and details
- FLEET_ID: The ID associate with the vehicle within a fleet.
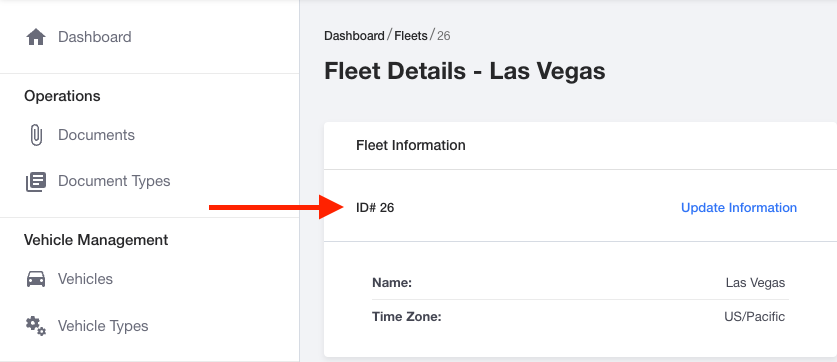
- How to locate the Fleet ID: Navigate to the “Fleets” tab under the "Location Management" section of the side navigation bar.
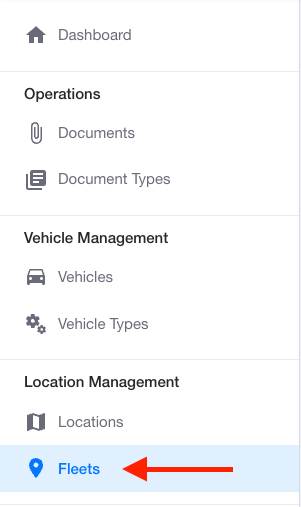
-
- Select the fleet that you want to place that vehicle into. The ID number is displayed under “Fleet Information” section.
6. Save your Excel file with updated information.
7. Navigate back to the “Vehicles” tab from the side navigation bar.
8. Click “Import CSV” ti import your new data.

9. Drop or browse to upload your CSV and then Click “Next”.
Your bulk vehicle upload is now complete!