-1.png?width=200&height=51&name=LM_NuBlu_Horiz_Hi%20(1)-1.png)
Setting a vehicle's status to Active is a required step during the initial setup of your organization. By default, all new vehicles are 'Inactive' and must be activated before they can be assigned to a service.
Beyond setup, managing vehicle statuses like In Shop and Retired is essential for day-to-day fleet operations. This allows you to accurately track vehicle availability, minimize downtime for maintenance, and maintain a clear operational overview. This article will guide you through changing a vehicle's status.
Instructions
When setting the status of a vehicle the user will have the option to define a timeframe for the specific status to take effect or just set the status from the current time until forever.
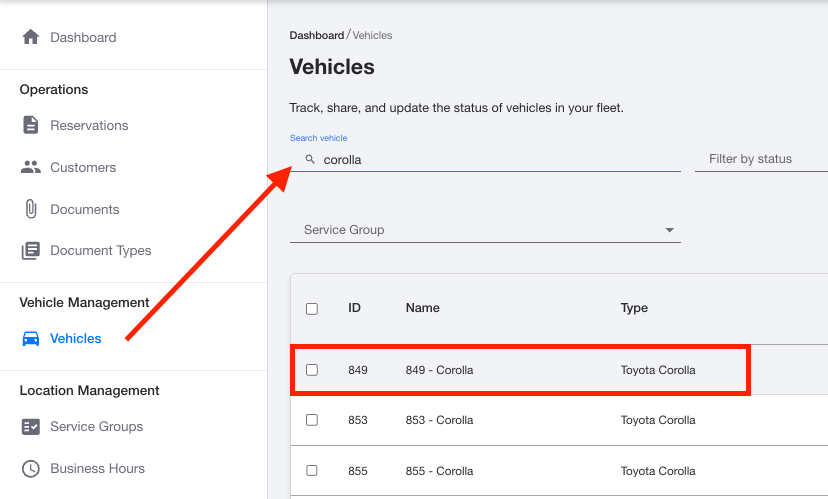
1. To change the vehicle status, navigate to the Vehicles Management module in Mission Control.
2. Select Vehicles in the navigation menu.
3. Search for the vehicle using the search bar and use the available filters as needed.
4. Select the specific vehicle by tapping on the row.
5. From the vehicle details page, click the Update Status button at the top-right corner of the page.

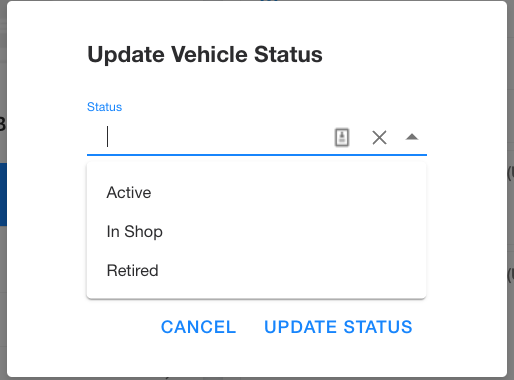
6. The Update Vehicle Status modal will appear where you can select the status you want to set for the vehicle with the given options of Active, In Shop, and Retired.
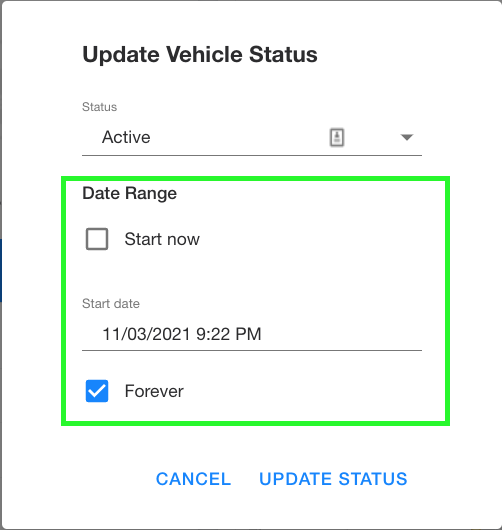
7. Define the date range for the selected status by toggling the options for Start now and Forever. Toggling either of these options off will allow for the user to select a date and time for the option. This gives an admin the ability to schedule a status change for a vehicle when there is upcoming scheduled maintenance as an example.
8. Different options will appear when choosing In Shop or Retired as a status. A Reason drop down menu will appear where you'll need to select an option from the list. Within the same screen, you can enter details and an explanation for why the vehicle has changed statuses.
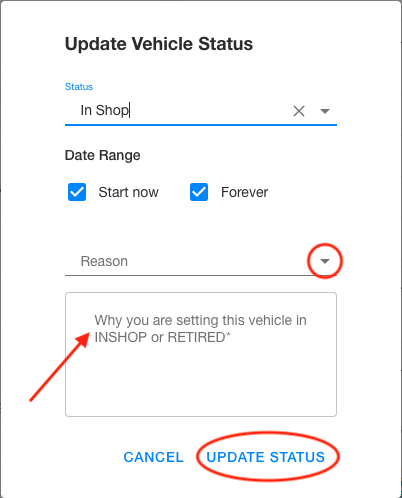
9. Save the new status by clicking Update Status.
10. A confirmation message will appear in green on the top right of the page once the vehicle status is saved and updated.
Vehicle Status Definitions:
- Inactive: The default status for all newly created vehicles. Inactive vehicles are not visible and cannot be assigned to a service or reserved.
- Active: The vehicle is operational and available to be assigned to a service. Once assigned to a service group, it becomes eligible for reservations.
- In Shop: The vehicle is temporarily unavailable for reservations due to maintenance or servicing. Customers will not be able to reserve the vehicle.
- Retired: The vehicle has been permanently removed from the fleet. It will no longer report alarms and cannot be reserved by customers.
Vehicle is Active! What's Next?
By setting your vehicle's status to Active, it is now visible within the system and ready for assignment. This is the final step in preparing a vehicle for use.
The next step is to assign your vehicle to a service. This makes the vehicle available to that specific part of your operation, allowing it to eventually be added to a Service Group for reservations.