-1.png?width=200&height=51&name=LM_NuBlu_Horiz_Hi%20(1)-1.png)
Think of a fleet as the main container for a group of your vehicles. Creating a fleet is a foundational step that connects your vehicles to both a physical location and the service you offer.
When you create a fleet, you will link two essential components:
- A Location: This establishes the physical "home base" for all vehicles that will be added to this Fleet.
- A Service: This determines which of your services the fleet and its vehicles belong to.
Instructions
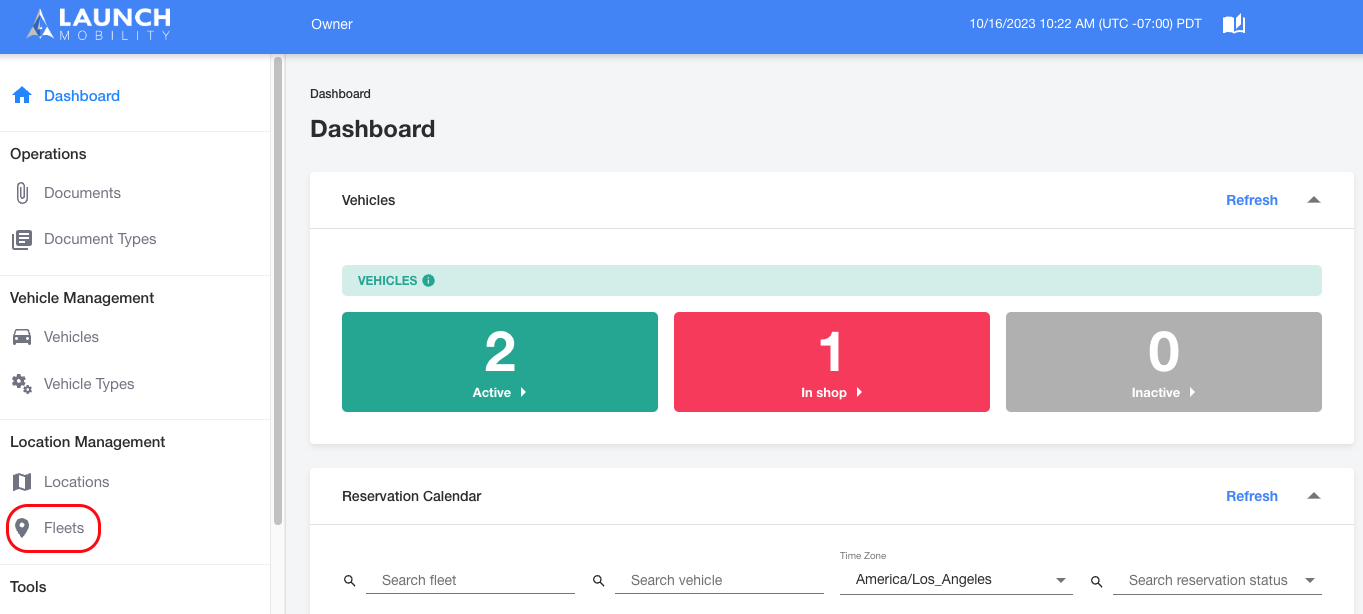
1. From Owner View, select Fleets from the navigation menu.
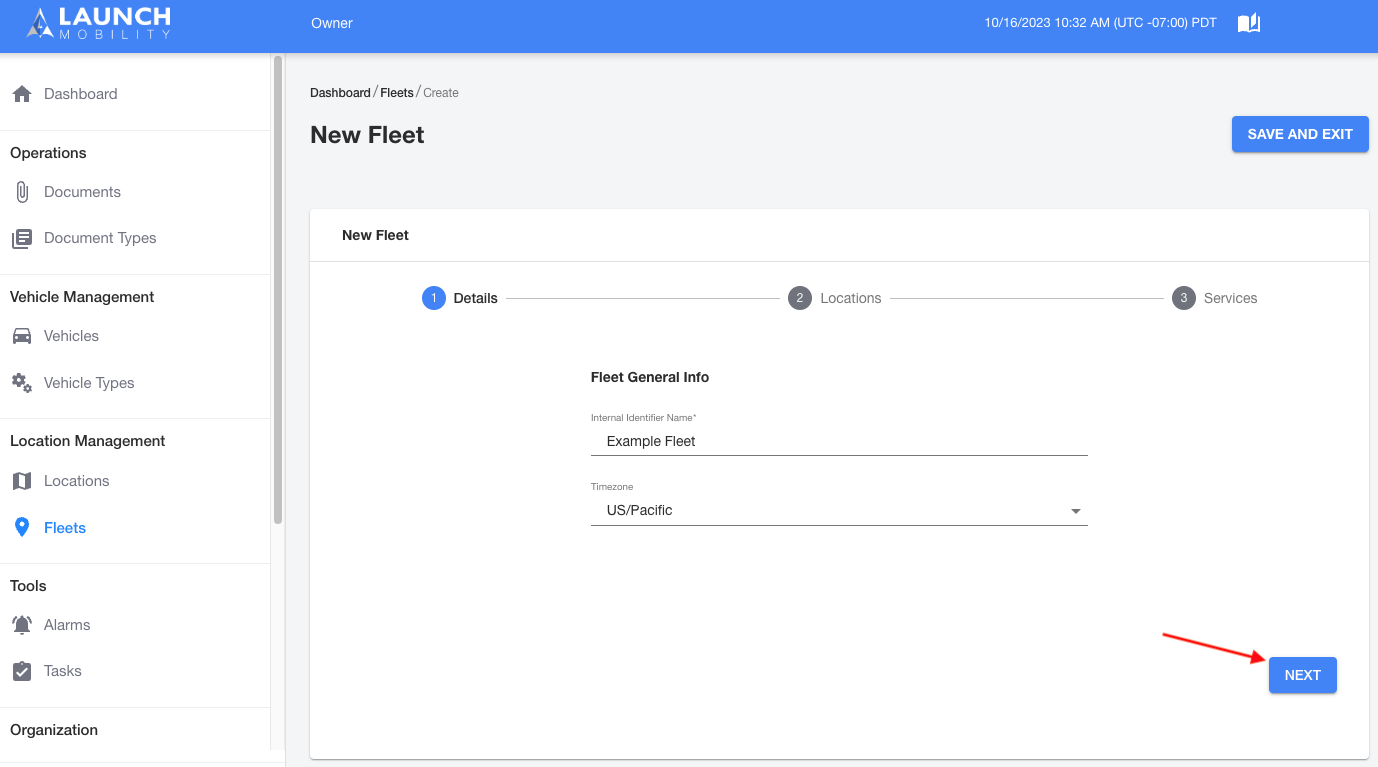
2. Select the Create New Fleet button.

3. Enter a name for your fleet and select a timezone from the list. Once this information has been entered, click the Next button.
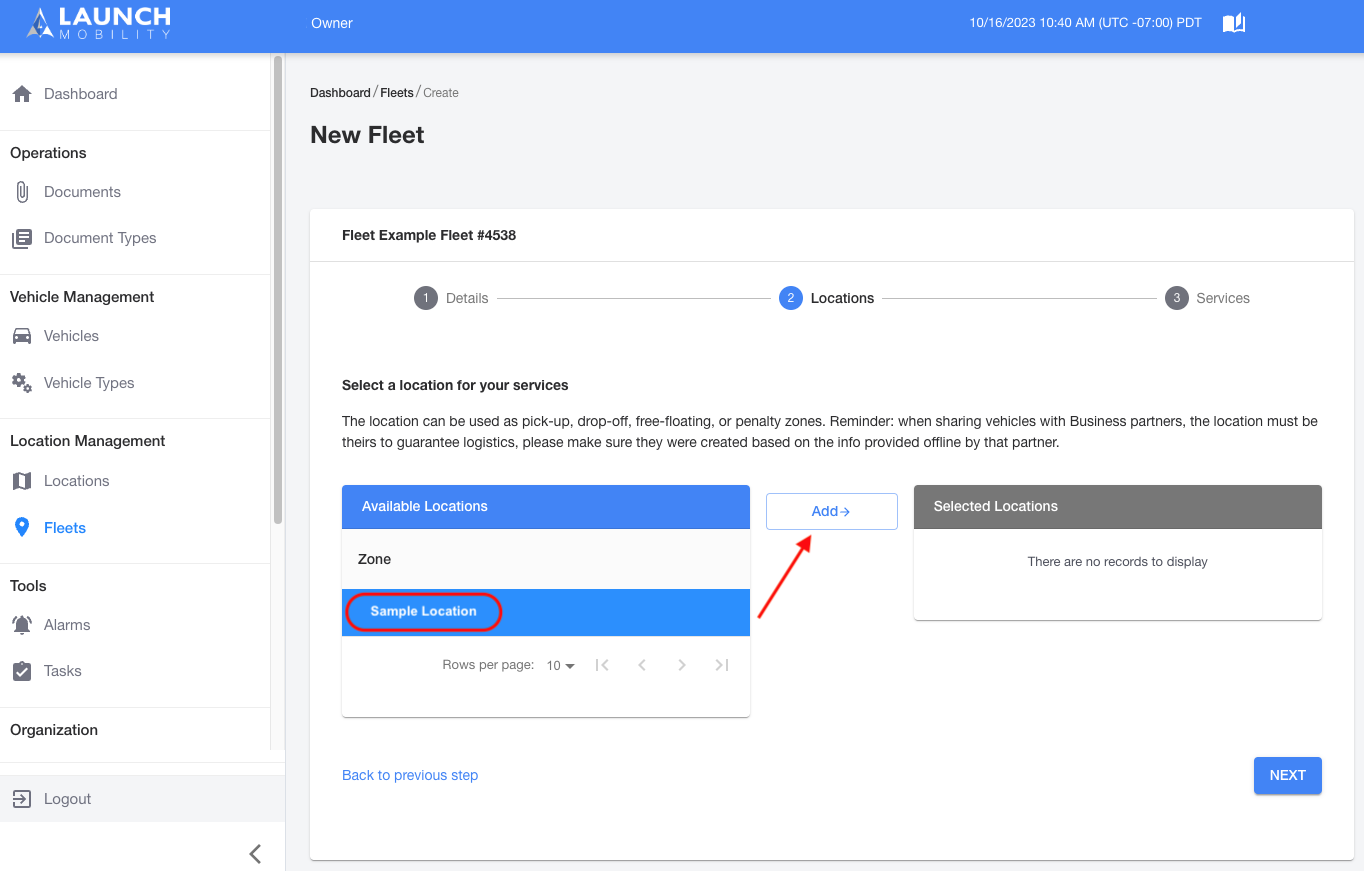
4. Select a location that you would like to assign to the fleet, then click the Add button. Once this has been done your location will appear in the Selected Locations box on the right hand side of the screen.
Note: It is possible to add multiple locations if required.
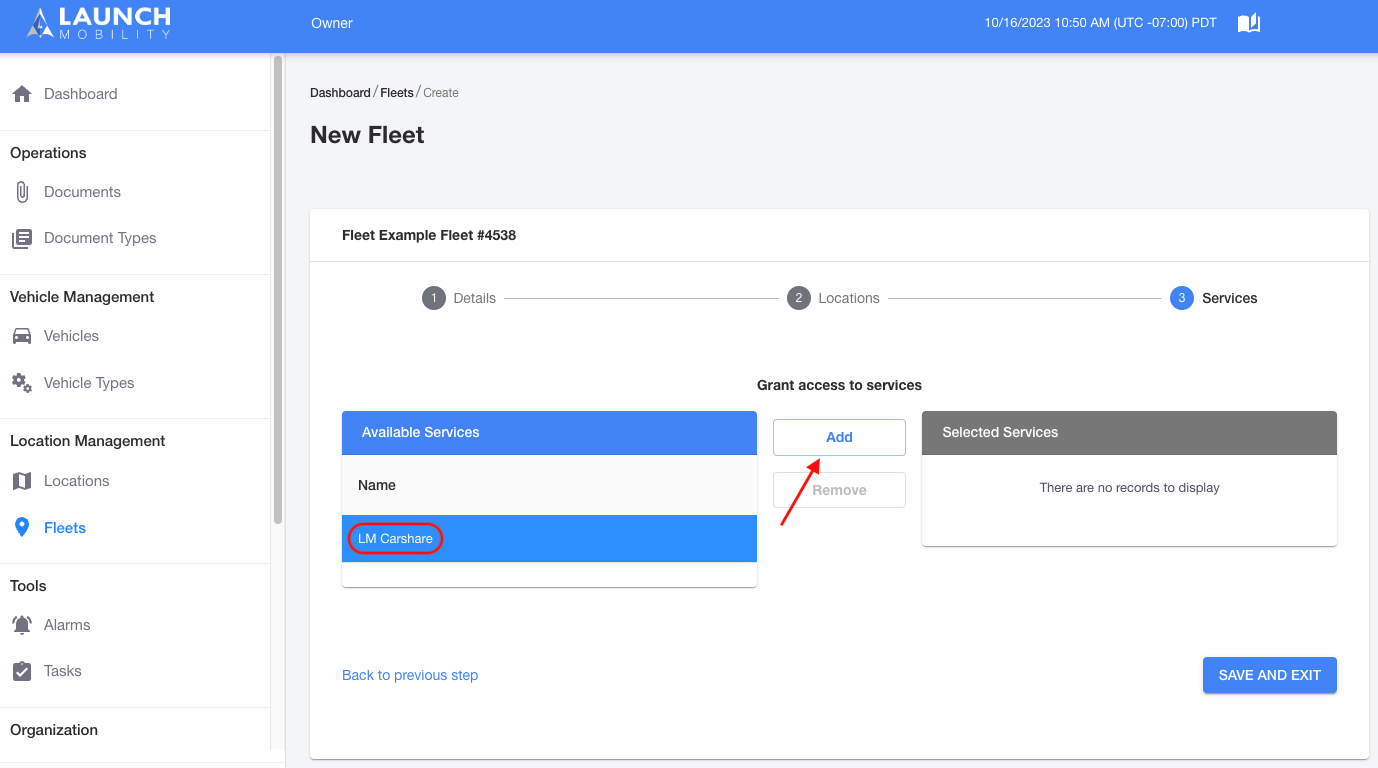
5. Select the service that you would like to assign to the new fleet. This will ensure that any vehicles belonging to this fleet can be shared with the service. Once this has been done your location will appear in the Selected Services box on the right hand side of the screen. Then click the Save and Exit button.
Fleet Created! What's Next?
You have successfully created a fleet, establishing the essential link between your vehicles, a physical location, and a service.
Before you can add individual vehicles to this fleet, you first need to define what kinds of vehicles it will contain. The next step is to Create Vehicle Types. A vehicle type acts as a template for each specific year, make, and model you plan to offer.