-1.png?width=200&height=51&name=LM_NuBlu_Horiz_Hi%20(1)-1.png)
The Service Group is the most important organizational tool in your setup. Think of it as an "operational package" that bundles your vehicles with a complete set of rules. Instead of applying settings to each vehicle one by one, you assign vehicles to a Service Group, which then controls everything for those vehicles:
- Where they are located
- When they are available (Business Hours)
- How they can be booked (Reservation Rulesets)
- Who can see them (User Groups)
This "package" is what your drivers will reserve in the app. When a driver makes a reservation, they select a Service Group (e.g., "Main Office - Sedan") rather than a specific vehicle. Our system then automatically assigns the best vehicle from that group to the reservation. This is done to ensure all vehicles are used evenly, maximizing fleet utilization by prioritizing the vehicle that has been idle the longest.
This article will guide you through creating a Service Group and defining its core operational rules.
Instructions
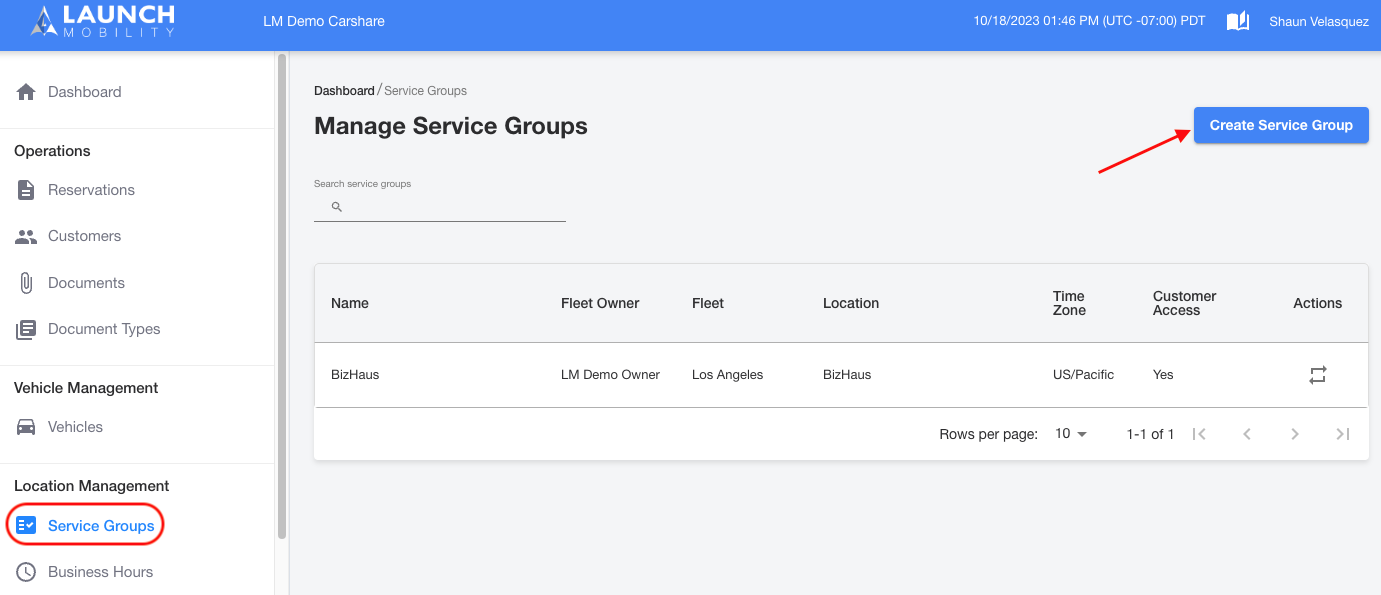
1. In Service view, select Service Groups in the navigation menu.
2. Select the Create Service Group button.
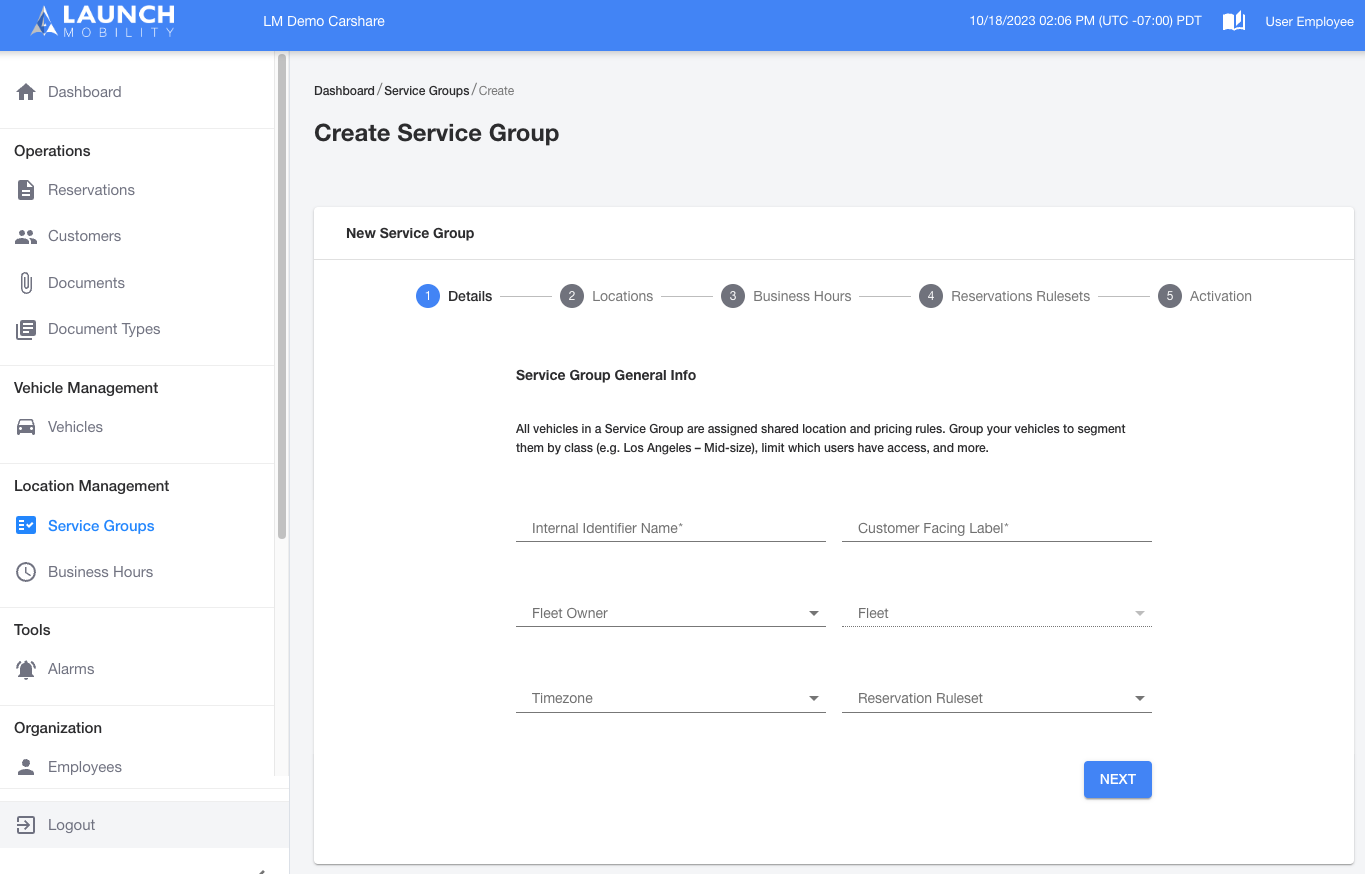
- Internal Identifier Name - This is the name that will be displayed in Mission Control.
- Customer Facing Label - The name that will appear in the app for drivers to select.
- Fleet Owner - Select the owner of the vehicles you're creating a Service Group for.
- Fleet - Select the fleet the vehicles that will populate this Service Group belong to.
- Timezone
- Reservation Ruleset - You will choose the predefined rules you want associated with the service group.
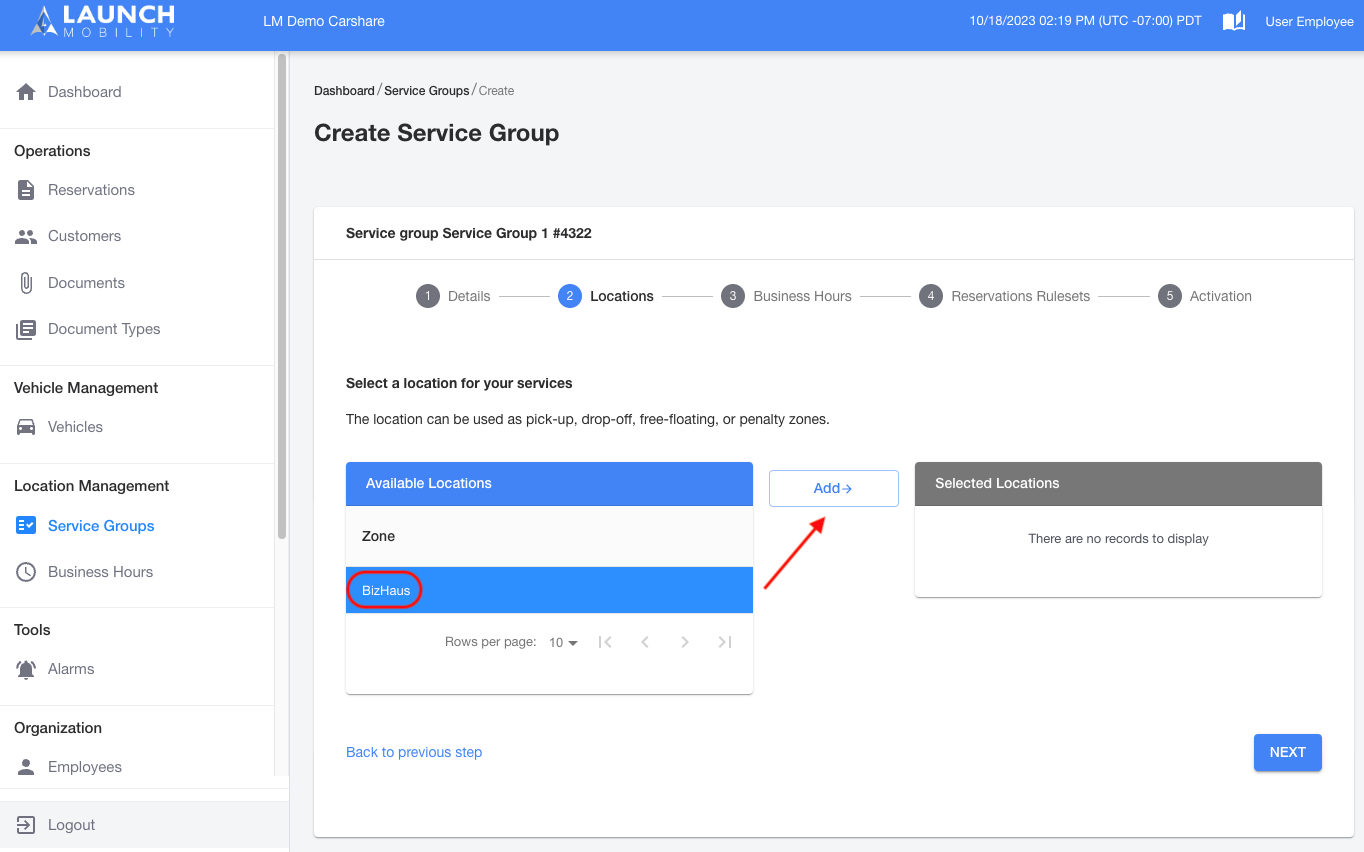
4. On the Locations screen, you will assign a physical 'home base' to this Service Group. Highlight a location from your Available Locations and click Add. Once this has been done your location will appear in the Selected Services box on the right hand side of the screen. Select the Next button.
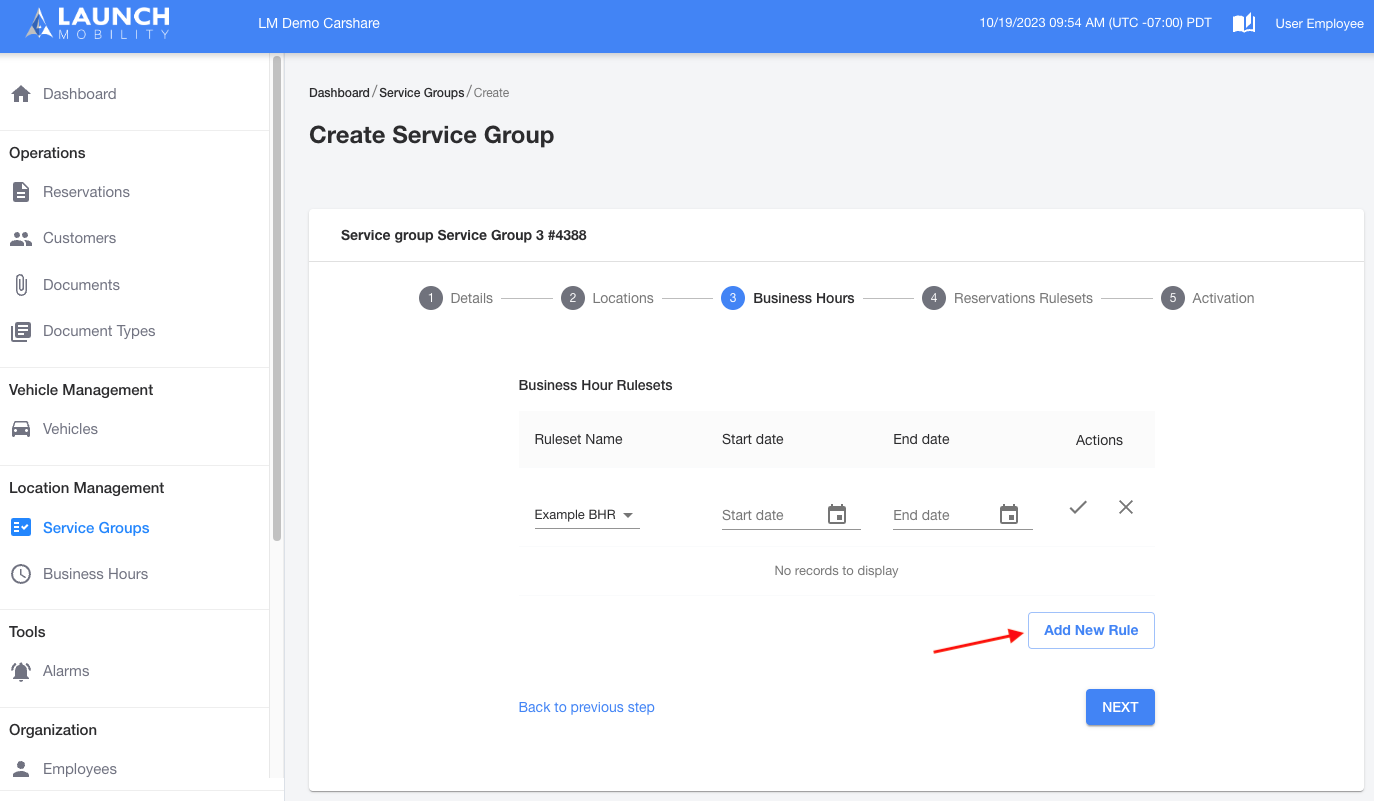
5. On the Business Hours screen, you will add the Business Hours Ruleset (BHR) you want to associate with your Service Group. Select the Add New Rule button, select your BHR from the Ruleset Name dropdown and set a date range. In order to save you changes, select the check mark. Once this information has been filled out, select the Next button.
Note: If vehicles in this group should be available 24/7 with no time restrictions, you can skip this step by clicking Next.
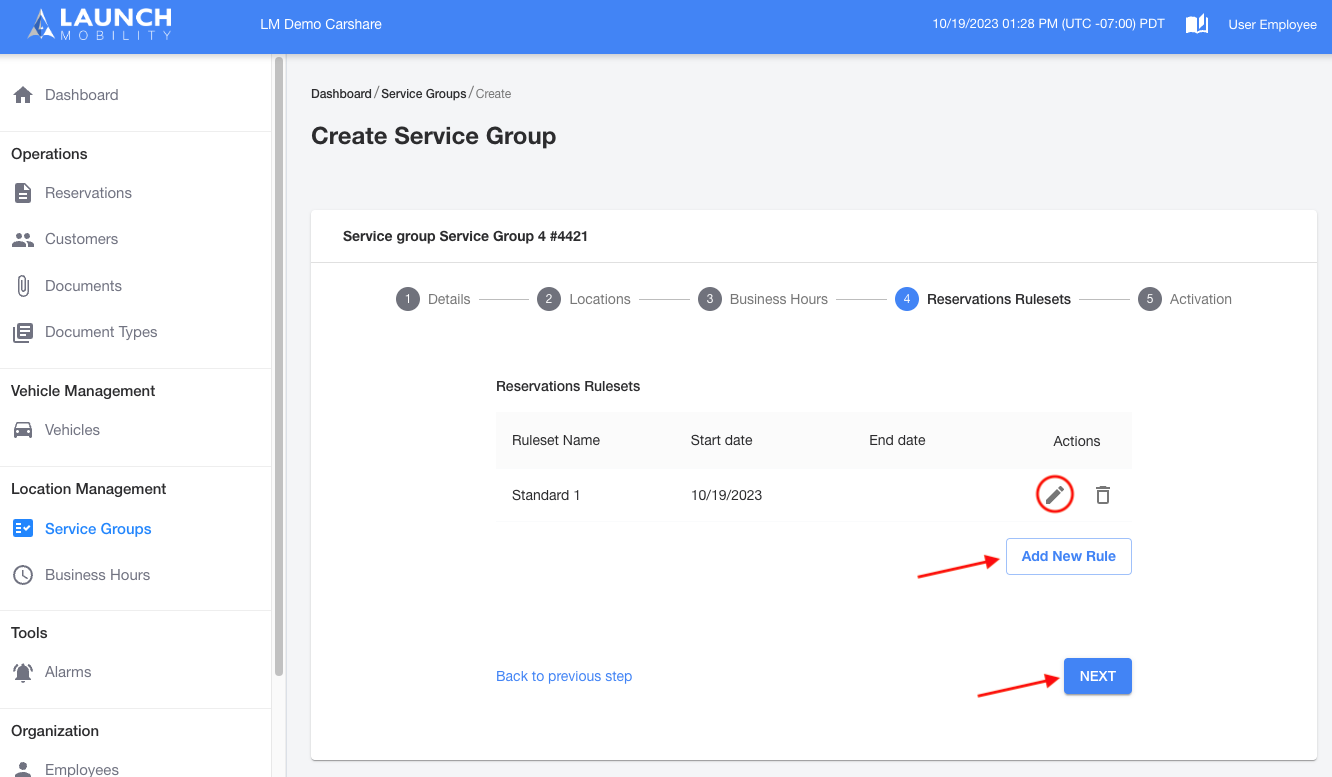
6. On the Reservation Rulesets (RRS) screen you can associate a RRS with you service group. In order to switch you can either select the Add New Rule button or select the edit icon. Please keep in mind that only one RRS can be associated with your Service Group. Select the Next button once you've made your choice.
Note: If your organization only has one RRS/reservation type there's no need to make any changes on this screen and you can simply select the Next button to advance.
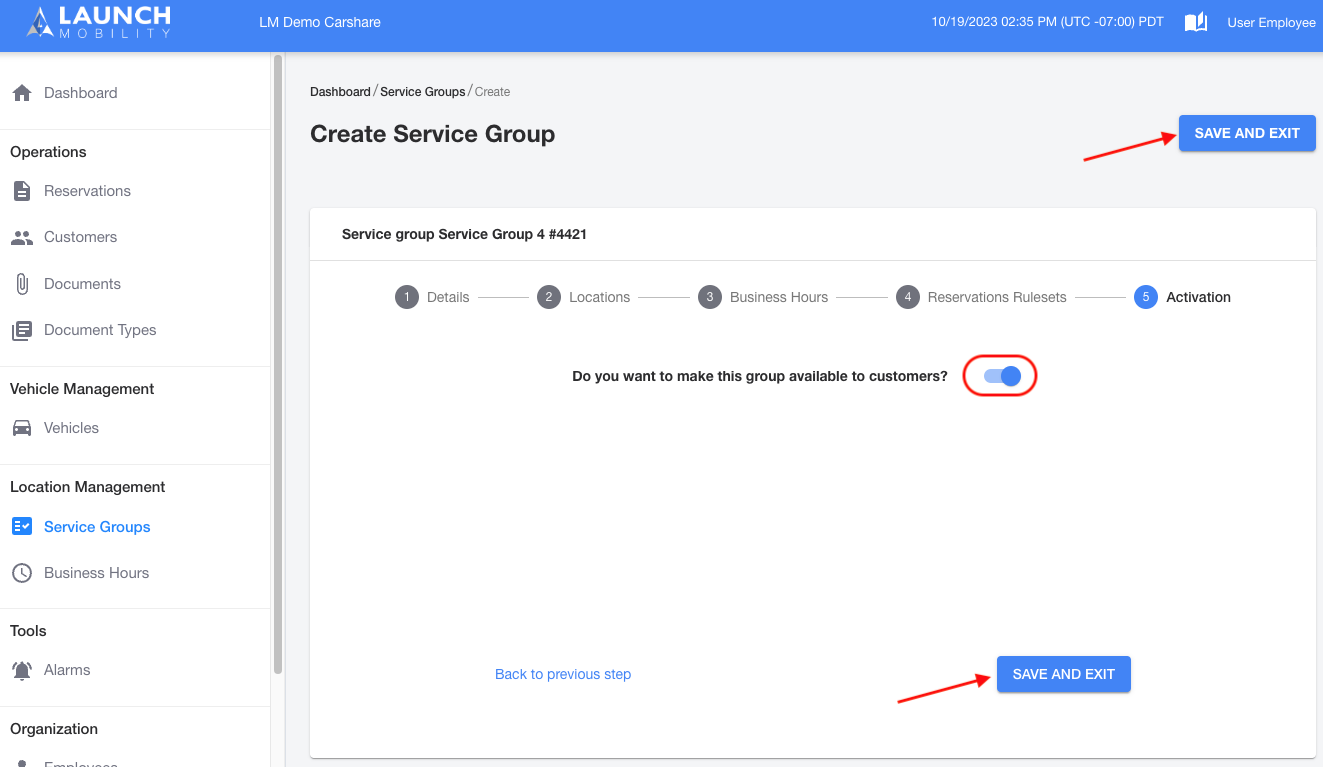
7. On the final screen, you will activate the service group. Use the toggle to make this group and its ruleset available to customers. Select the toggle switch to control the visibility for your service group. Select the Save and Exit button in order to finish your service group set up.
Service Group Created! Now, Add Your Vehicles
Your service group is now created, complete with its unique rules for location, availability, and reservations. However, it's currently an empty container.
The final and most important step is to assign vehicles to this service group. This action places your vehicles inside the "operational package" you just built. Once vehicles are added, the group will appear in the app for drivers to select, and the system will begin assigning those vehicles to reservations automatically.