-1.png?width=200&height=51&name=LM_NuBlu_Horiz_Hi%20(1)-1.png)
The option to Create a Vehicle is only available at the Owner level. Prior to creating an individual vehicle in the system, you will have had to create it's vehicle type. There are two different options for importing vehicles - individually or in bulk by importing a CSV file.
Instructions for Individual Vehicle Creation
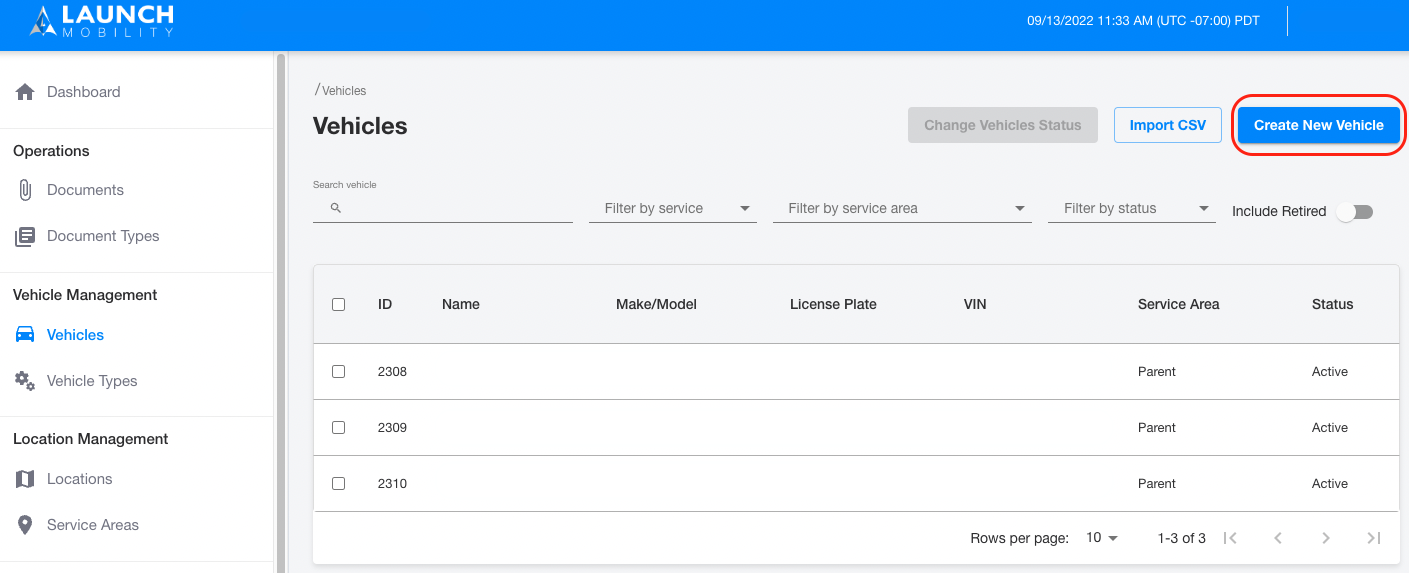
1. Select Vehicles from the navigation menu on the left. Then click the Create New Vehicle button in the top right corner.
2. Fill in your individual vehicle's Information/details. You will have the opportunity to enter the license plate, VIN and color among other things. This is also the screen where you will determine your vehicle's fleet. Once you have filled in all of the appropriate information click Next.

3. Next you will select a telematics broker (ex: Invers, Samsara or Geotab) for your vehicle. First, you'll need to highlight your choice in the Available Brokers box. At this point you'll have to option to either connect your vehicle automatically or manually. Once this has been completed, your choice will appear in the Active Brokers box.
Note: If you are going to connect automatically you'll need to make sure that the vehicle's VIN is accurately entered in your telematics provider's portal and in Mission Control. Select the Connect Automatically button.
Note: To create the connection manually simply enter the hardware's ID number and select the Connect Manually button.
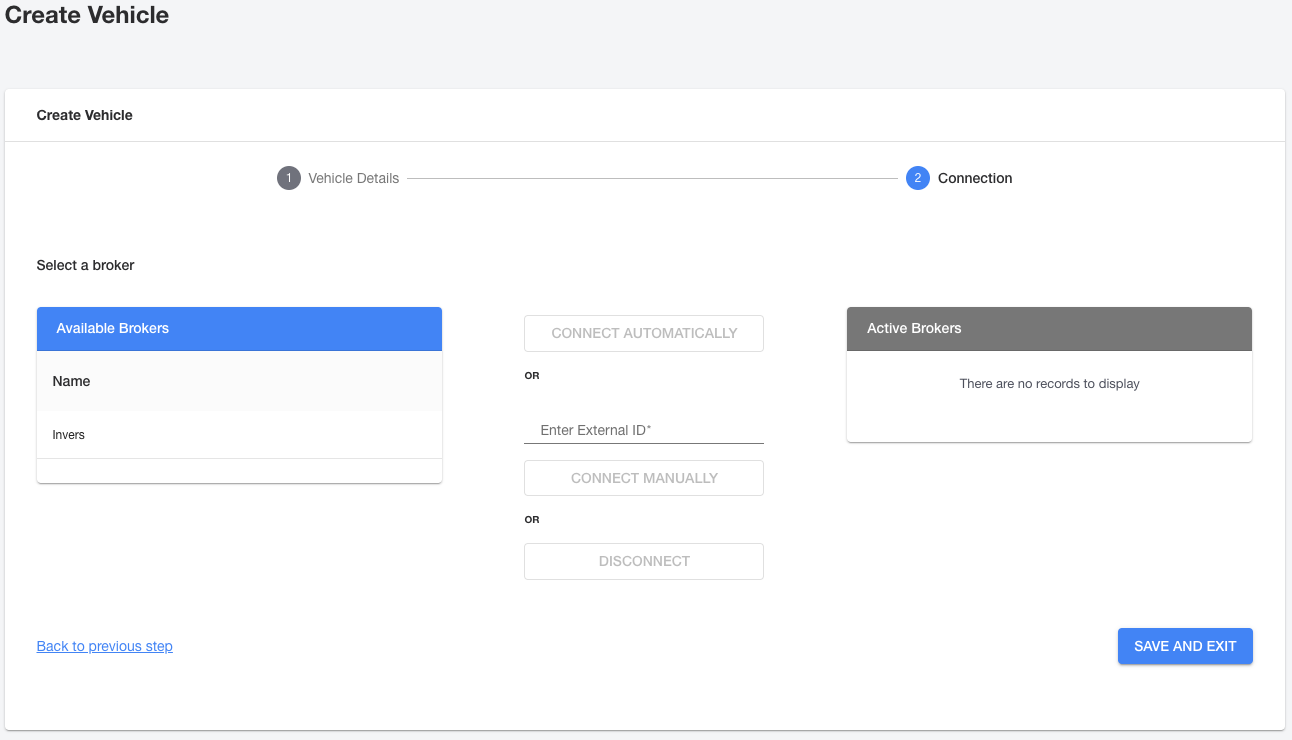
Note: If your vehicle doesn't have telematics hardware or the hardware isn't installed at the time you're creating the vehicle in Mission Control, you can skip this step.
4. Select Save and Exit in order to complete the process of adding a vehicle individually into the system.
Instructions for Bulk Vehicle Creation
Before starting this process, you will need to make sure you have created vehicle types for all of the vehicles you are about to import. Please take note of your vehicle type's ID number and fleet ID number. These will need to be referenced during this process. To gather this information navigate to Owner view and select Vehicle Types and Fleets from the navigation menu.
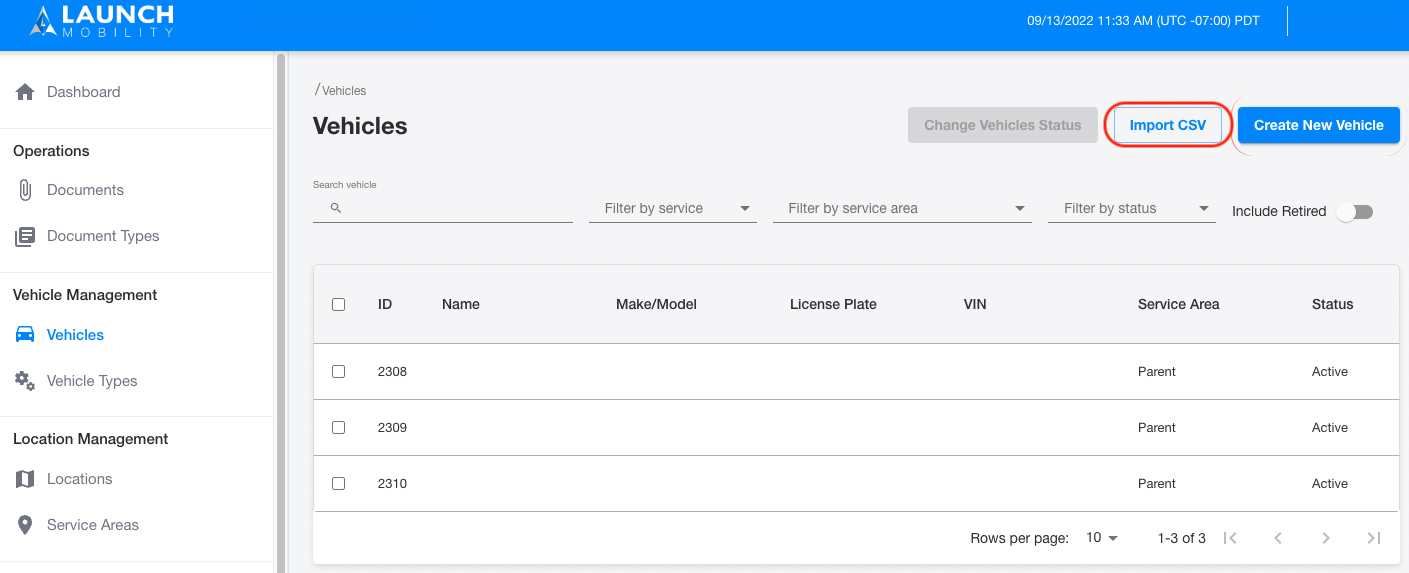
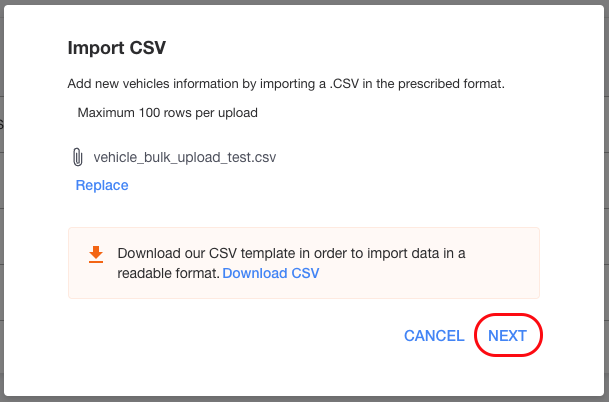
1. Select Vehicles from the navigation menu on the left. Then click the Import CSV button in the top right corner.
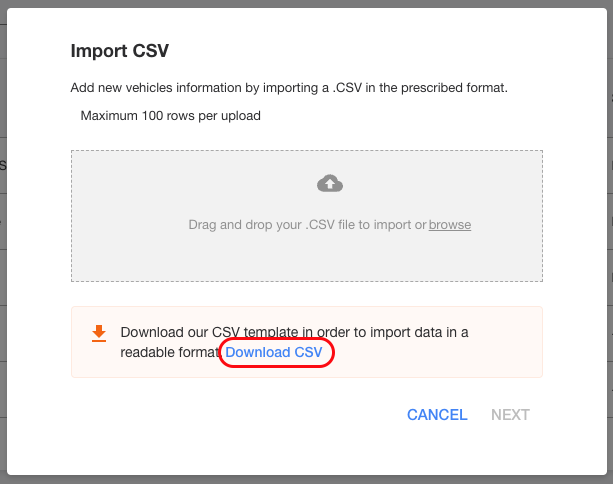
2. An Import CSV window will pop up. Here you will have the opportunity to download a template in the prescribed format for Mission Control. Select Download CSV.
3. Fill this CSV file with your vehicle's information. Please take note that the following columns are required - vehicle type, name, VIN & fleet ID. The following columns will be present:
-
- Vehicle Type*
- Name*
- Color
- VIN*
- License Plate
- Price
- Seats
- Details
- Fleet ID*
4. Once you have entered the appropriate information for all of your vehicles (maximum 100), save the CSV. You can then browse or drag and drop this file into the window. Select the Next button.
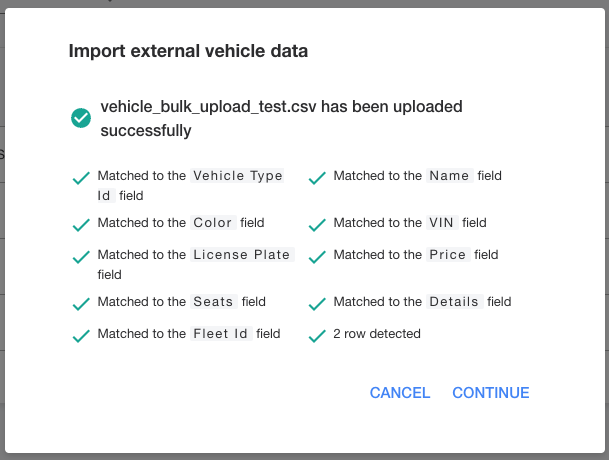
5. The system will validate that everything has been uploaded successfully. The import process could take a few minutes based on the amount of vehicles included in the CSV. You will receive an email once the process has been completed.
Vehicles Created! What's Next?
Your individual vehicles have been successfully created and added to your fleet. There is one crucial step to complete before they are ready to be assigned to your service: by default, all new vehicles are set to an 'Inactive' status.
To make them available for assignment, you must make the vehicles Active. The next article will guide you through this quick but important process.