-1.png?width=200&height=51&name=LM_NuBlu_Horiz_Hi%20(1)-1.png)
A user group (UG) can be used to limit the visibility of what other employees in Mission Control can see. This can be accomplished by setting up a parent/child relationship between two UGs. In this article we’re going to set up a Fleet Manager to only have access to their assigned service group (SG) in Mission Control. This will ensure that when the Fleet Manager signs into Mission Control they will only see what’s been allowed by their UG, even if there are other vehicles in the same service.
Instructions
We will be using the following information for this example:
- Location - Sample Location
- Fleet - Sample Fleet
- Service Group - SG-1
-
User Group - Fleet Manager-1
-
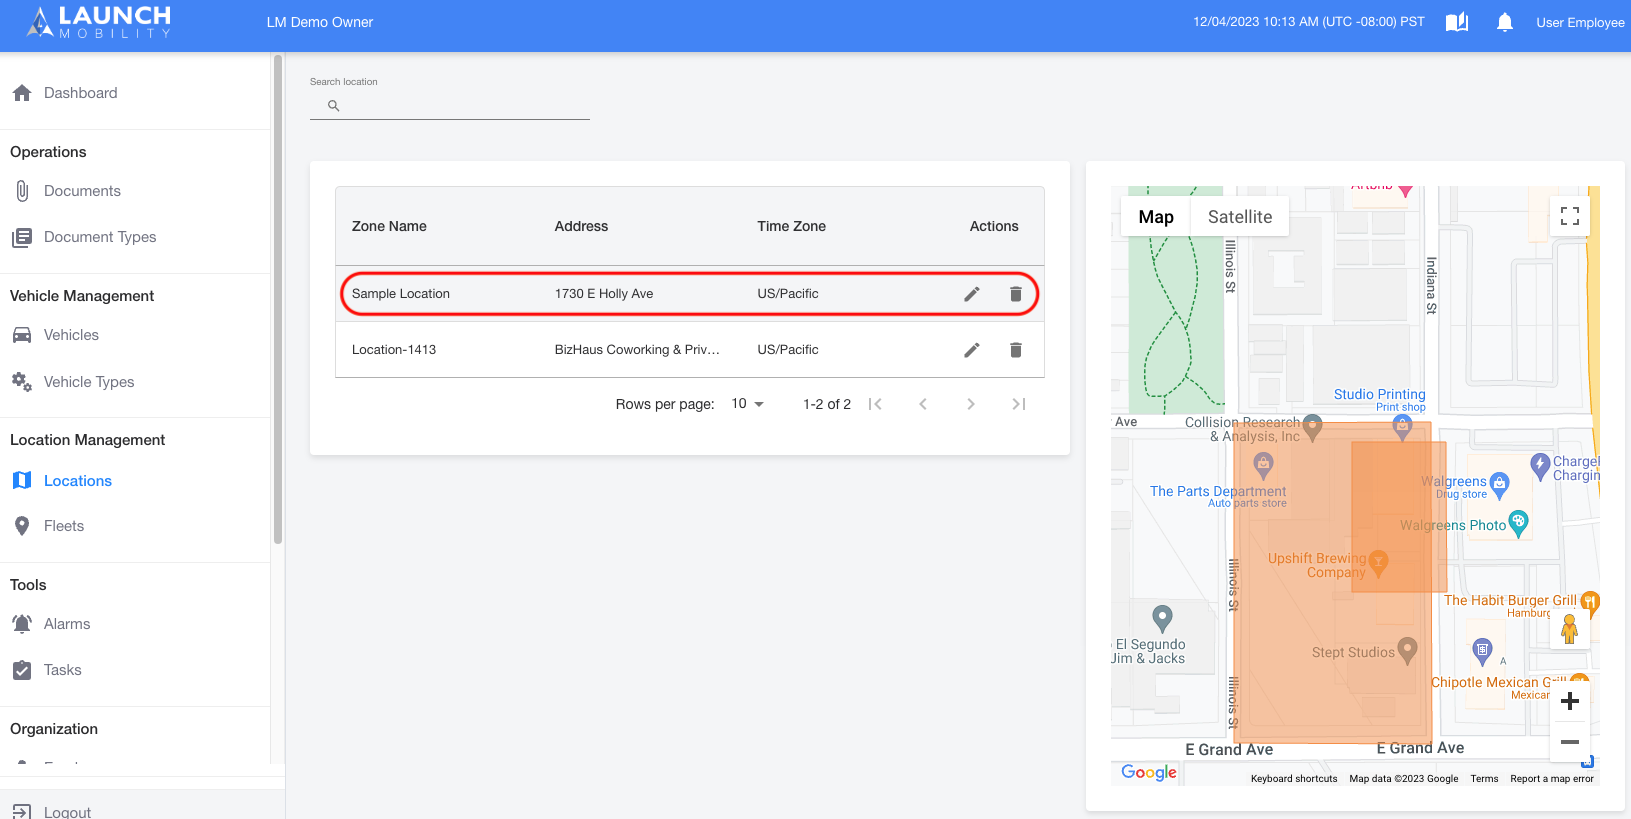
In Owner View, set up a location the Fleet Manager will be overseeing, in this example it’s "Sample Location". Remember that a location is a physical area where the fleet’s vehicles are parked.
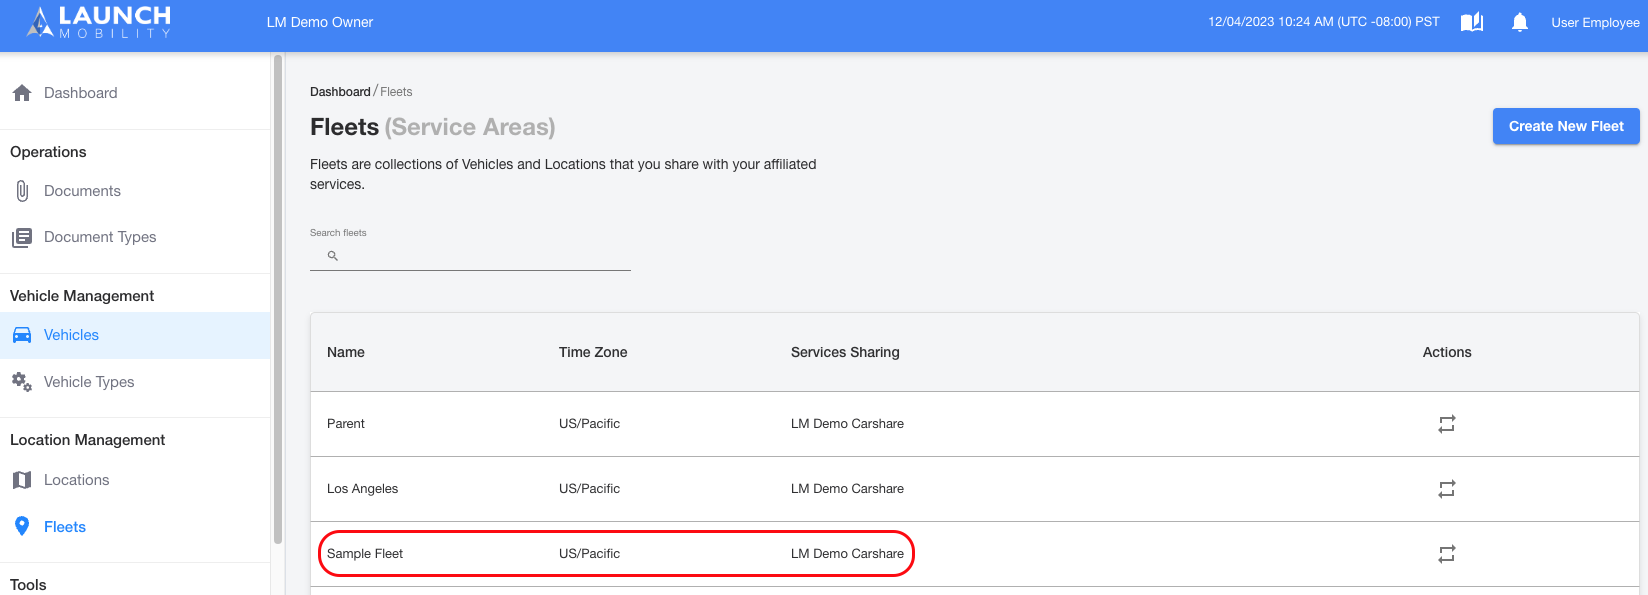
- In the next step of this process, we’ll create a fleet. Fleet creation is also carried out in Owner View. The fleet in this example is named "Sample Fleet". During set up, this fleet was associated with the location set up in the first step.
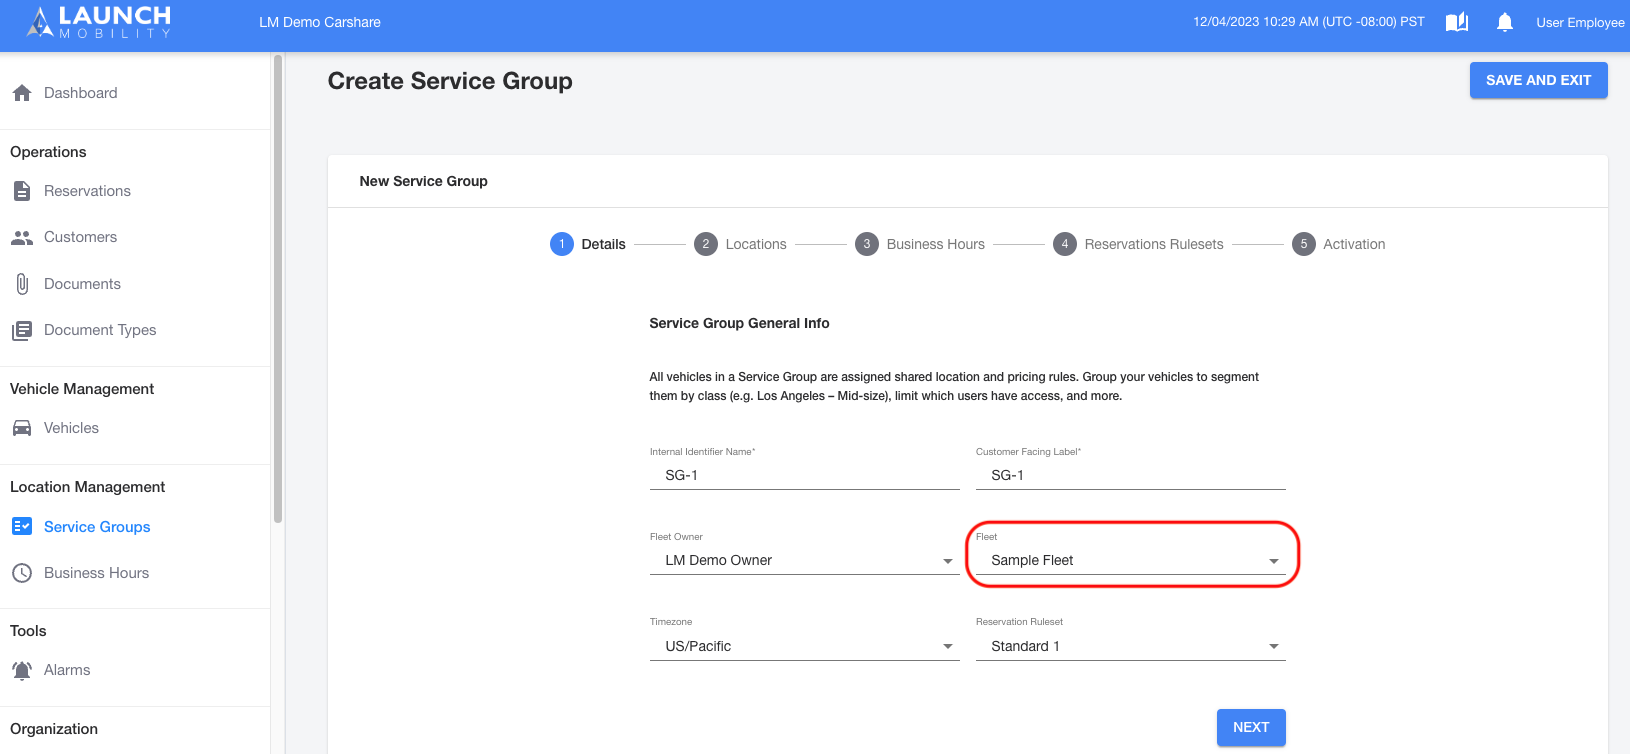
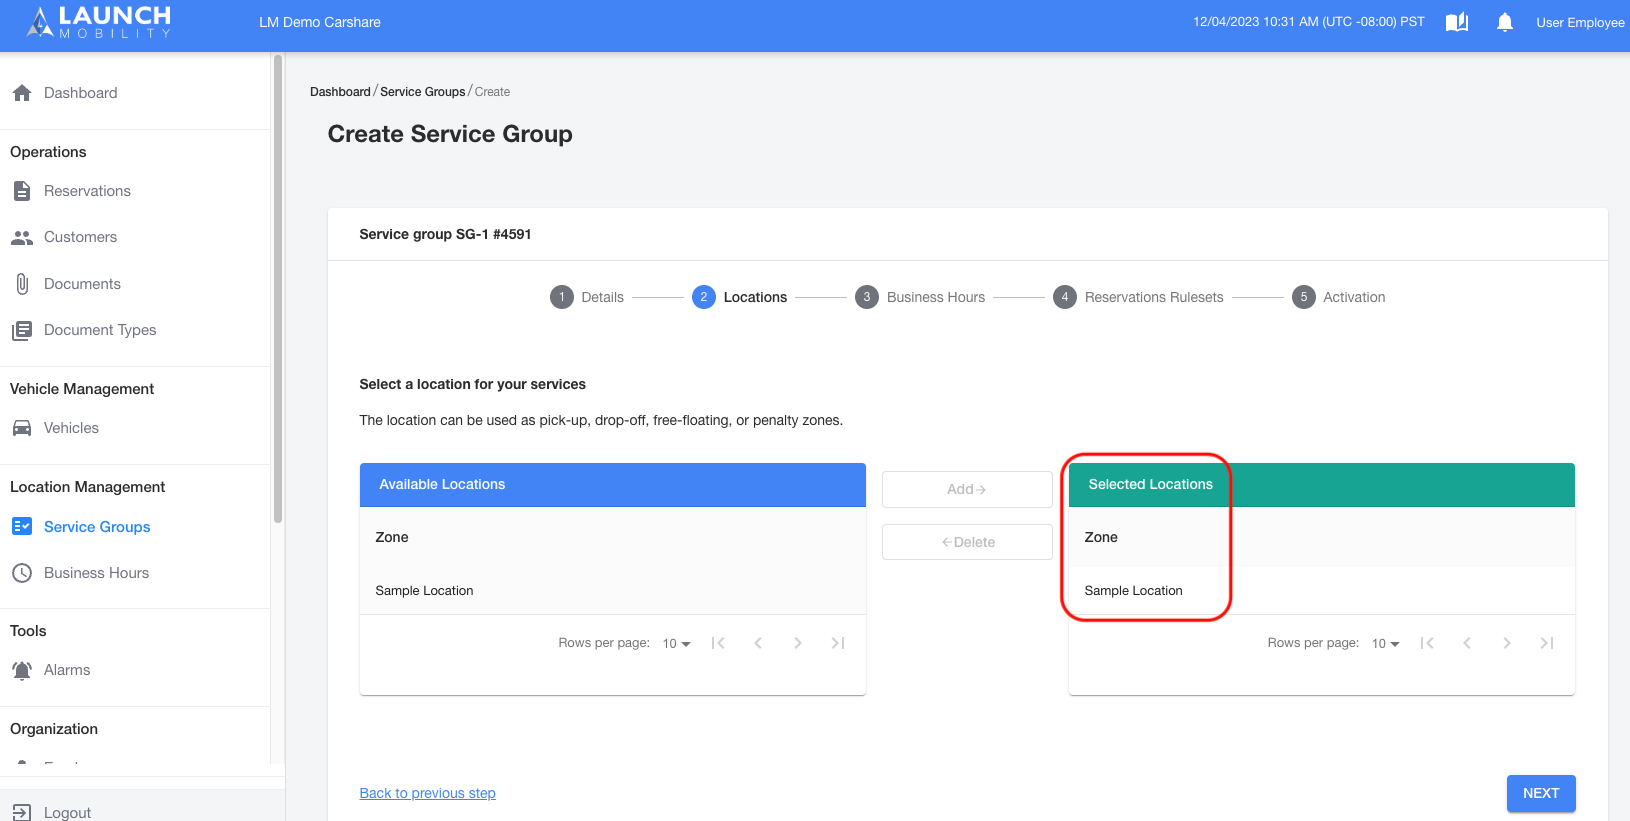
- Next, we’ll want to set up the Service Group (SG) the Fleet Manager will be overseeing. Select the service from the drop down in Mission Control that you’d like the the Fleet Manager to have access to. In this case, "SG-1" has been set up for the Fleet Manager.
Note: In steps 1 and 2 of he SG set up process, as administrator you will associate the location and fleet that were set up previously. A vehicle MUST belong to this fleet in order to have the option to add it to this SG.
- The vehicles that will reside within this SG must be added. We are segmenting our fleet to limit visibility in Mission Control, so we must first ensure the vehicle(s) you'd like to add belong to "Sample Fleet".
If the vehicle(s) being assigned to 'SG-1' do not already belong to a SG or fleet and are not shared with a service, follow this procedure:
-
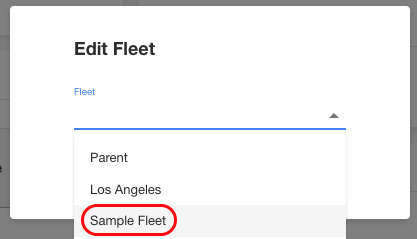
- In Owner View, select "Vehicles" from the navigation menu and select your desired vehicle from the list. On the Vehicle Details page you will see a section for "Fleets". Select the edit icon and select "Sample Fleet" from the drop down.

-
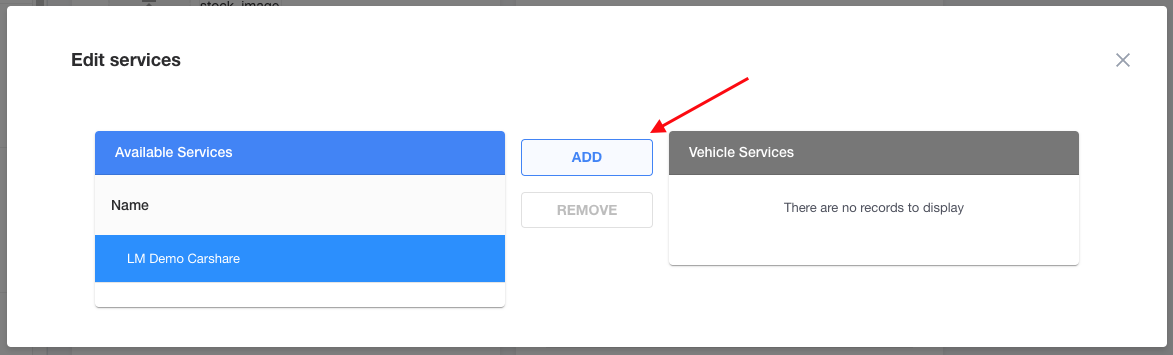
- Remain on the Vehicle Details page and locate the "Assigned Services" section. Select Edit Services and choose the service the vehicle will be operating in. Once this is done the vehicle will appear in that service's list in Mission Control.
Note: A vehicle must be in Active status in order to share it with a service.
-
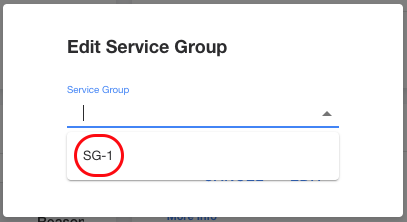
- In Service View, select "Vehicles" from the navigation menu and select your desired vehicle from the list. On the Vehicle Details page you will see a section for "Service Groups". Select the edit icon and add the vehicle to "SG-1".
If the vehicle(s) you're assigning to "SG-1" already belong to a SG/fleet and needs to be switched over the "Sample Fleet" then follow this procedure:
Note: The vehicle needs to be switched over to "Sample Fleet" otherwise you will not be able to assign it to "SG-1". Vehicles must belong to this fleet in order to be associated with this specific Service Group.
-
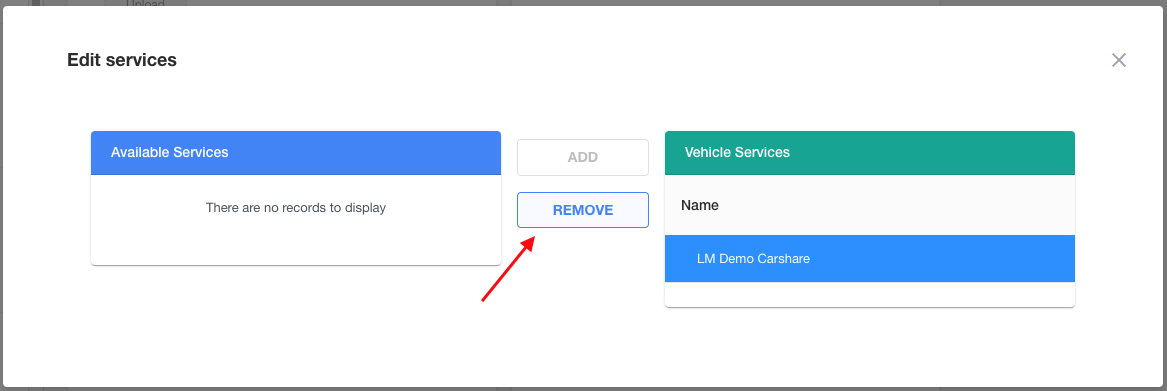
- In order to switch a vehicle's fleet, it cannot be associated with any service. In Owner View, select your vehicle and open the Vehicle Details page. Locate the "Assigned Services" section, select the edit icon. Highlight the service it's currently assigned to and select the "Remove" button.
-
- Now that the vehicle is disassociated with a service, you're free to switch fleets. On the Vehicle Details page, locate the Fleets section and select the edit icon. Select the edit icon and select "Sample Fleet" from the drop down.
-
- Remain on the Vehicle Details page and locate the "Assigned Services" section. Select Edit Services and choose the service the vehicle will be operating in. Once this is done the vehicle will appear in that service's list in Mission Control.

Note: A vehicle must be in Active status in order to share it with a service.
-
- In Service View, select "Vehicles" from the navigation menu and select your desired vehicle from the list. On the Vehicle Details page you will see a section for "Service Groups". Slect the edit icon and add the vehicle to "SG-1".

5. Once the vehicles are assign to the SG, it’s time to set up the Fleet Manager’s User Group/UG. Select "User Groups" from the navigation menu in Service View and then Create New User Group. In this example we will be creating the UG "Fleet Manager-1".
6. In the first step of the UG creation process, make sure to choose ‘Employee’ for User Group Type and ‘Fleet Manager’ for Default Role. Then choose a SG, in this case we're going to choose "SG-1". We have just set the permission telling the system that anyone in the "Fleet Manager-1" UG only has access/visibility into vehicles that belong to "SG-1".

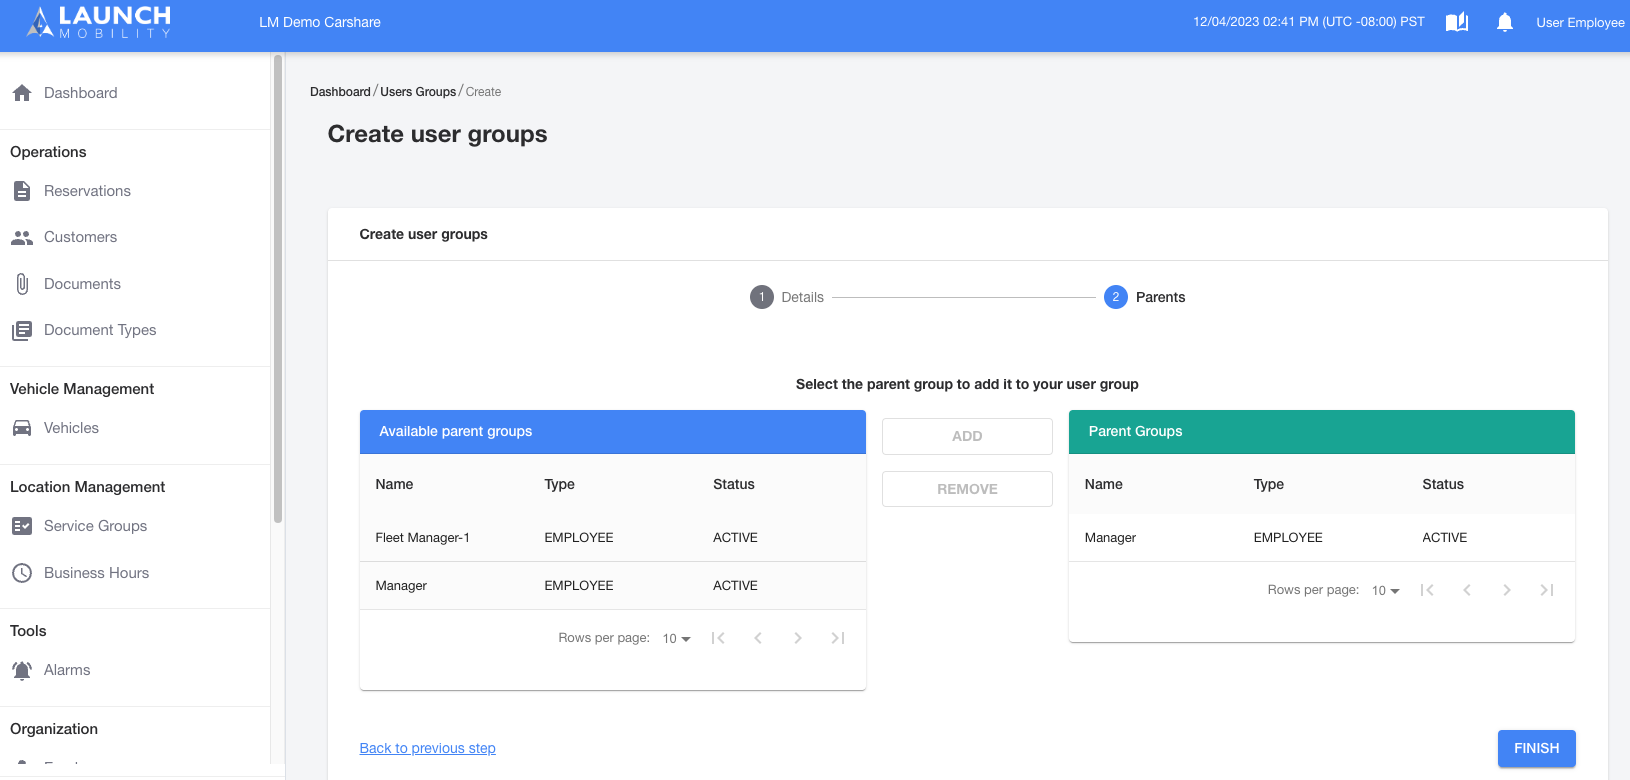
7. Next, we’ll be selecting the UGs parent group. Every UG must have a parent, this could be the Admin UG you have set up for example. In this case, we will set the "Manager" UG as the parent. Anyone that belongs to this UG will have visibility into everything in this service. Multiple child UGs can be set up under a parent. Highlight the UG you’d like to set as a parent and select the "Add" button.
8. Next you’ll need to go to your Fleet Manager’s profile page and assign them to the UG. Select "Employees" from the navigation menu and find the "User Groups" section. In this example, "Fleet Manager-1" was selected.

Now that this process is complete this user will only see the vehicles you granted them access to when the log into Mission Control!