-1.png?width=200&height=51&name=LM_NuBlu_Horiz_Hi%20(1)-1.png)
How to Update a Vehicle's Telematics Information
Overview:
Occasionally a vehicle's telematics hardware needs to be switched out. We will outline the process for making that update in Mission Control.
Open the Vehicle's Profile Page (Owner View)
The ability to edit this information is only available in Owner View. Navigate to Vehicles and select the vehicle from the list that you need to update.
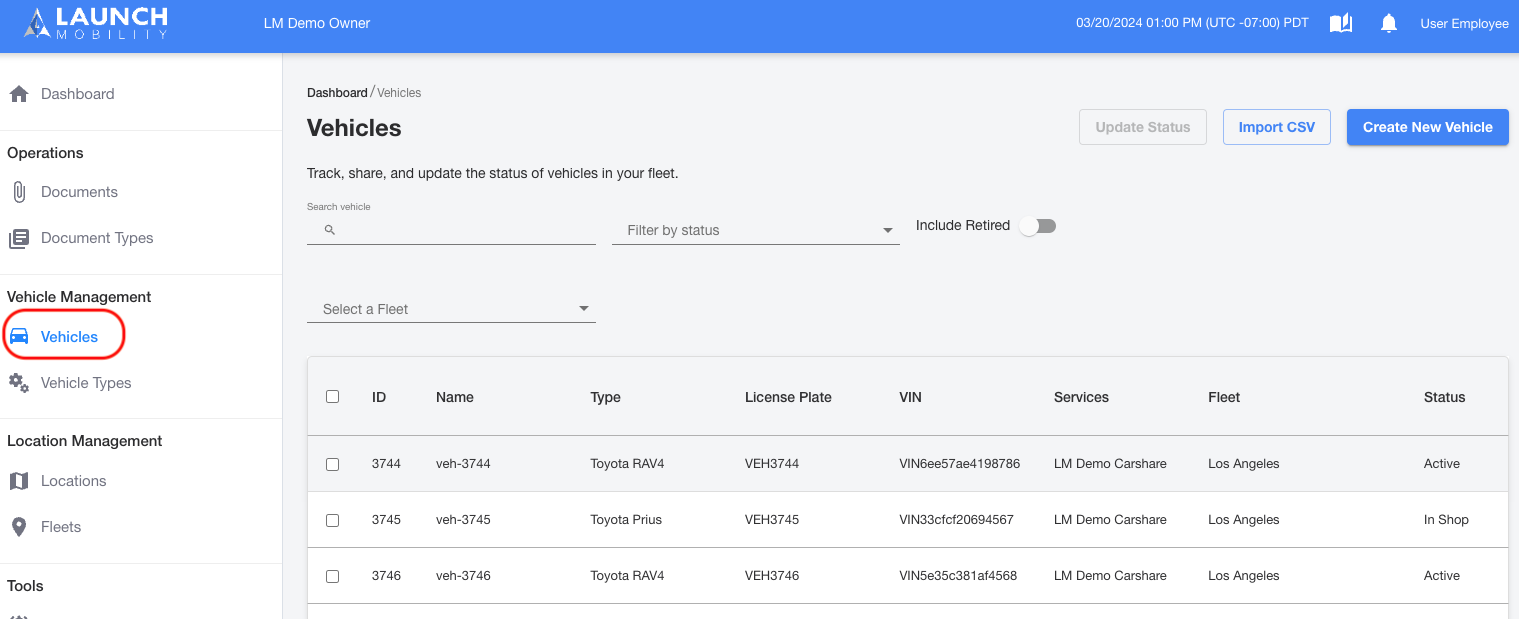
Locate the Brokers Section
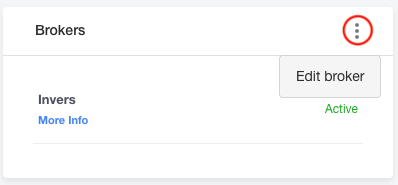
Once on the profile page, find Brokers and select the hamburger and then select Edit broker.
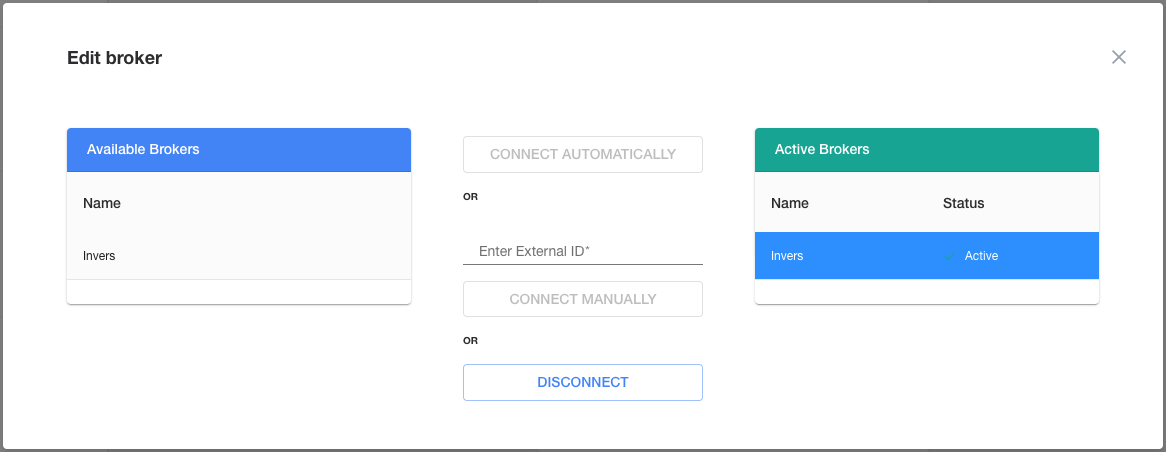
Disconnect from Current Broker
Before entering your new information, you'll need to disconnect from what's currently set up. Highlight your broker from the Active Brokers. At this point, the Disconnect button will become selectable. Click Disconnect.
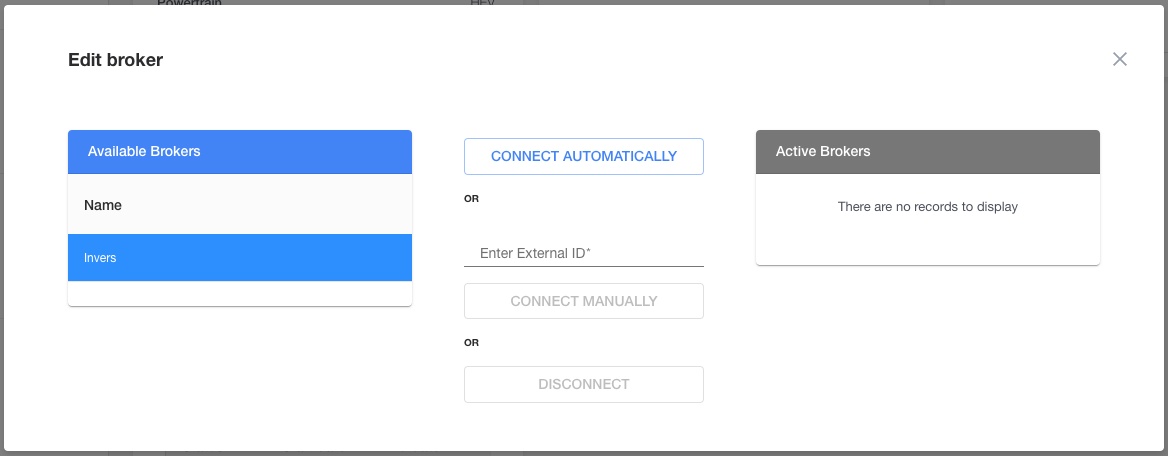
Reconnect Using New Information
Now you're ready to enter the information for the new hardware that's been installed. Select your broker from Available Brokers and the Connect Automatically button will become selectable. Connecting automatically is an option if the VIN an license plate information matches in both Mission Control and your broker's portal (FleetControl for Invers and MyAdmin for Geotab). You can always enter the hardware's ID manually into the Enter External ID field as well. Select either Connect Automatically or Connect Manually.
Test Drive to Re-Establish Communication
All that's left to do is to re-establish communication between the hardware and Mission Control. Take the vehicle for a short test drive, 5-10 minutes is sufficient, so the hardware has a chance to ping the system. Once this is completed, you will see up-to-date information in that vehicle's Telemetry section in Mission Control.