-1.png?width=200&height=51&name=LM_NuBlu_Horiz_Hi%20(1)-1.png)
The LM Technicians App functionality allows for an employee (technician) to make offline reservations to access vehicles via Bluetooth using the LM app on an access device such as a mobile phone or tablet.
The Technicians app will work regardless of which vehicle telematics solution is being used (INVERS, Geotab), provided that Launch Mobility has the integration built.
An Employee type User Group will need to be set up prior to beginning this process. By creating one, you will control the access to vehicles the technician will have. Once this has been completed you can begin the process of creating a reservation in the Technicians App.
Creating an Employee in Mission Control
We will first outline the process for creating an employee/technician in Mission Control. This process is completed by a Mission Control user with Admin-level permission. Technicians have to be created as employees within the specific service whose vehicles they need to access. If a technician needs access to more than one service you must invite the user as an employee for each service.
- Log in to Mission Control through the Fusionauth portal as an administrator, then navigate to the appropriate service.
- Select "Employees" from the navigation menu and then "Create Employee".
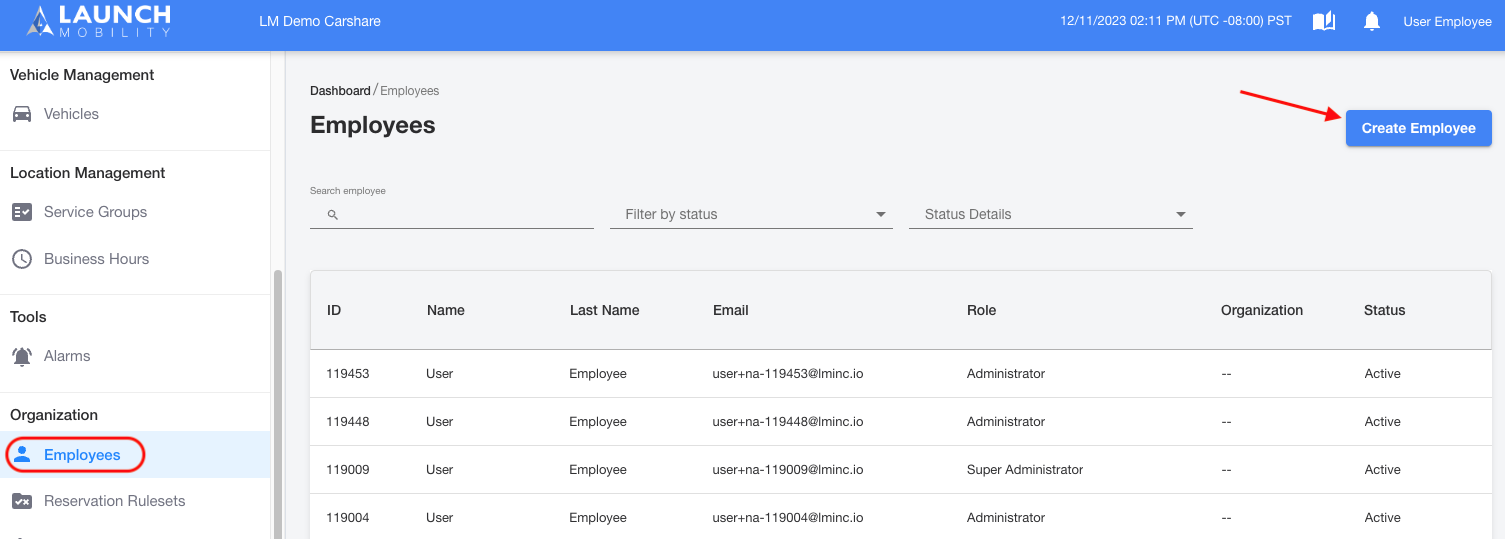
- An overlay will appear to create the employee. Select the User Group and enter all the required information and then select "Create Employee". At this point, the employee will receive an email asking them to create a password for their account.

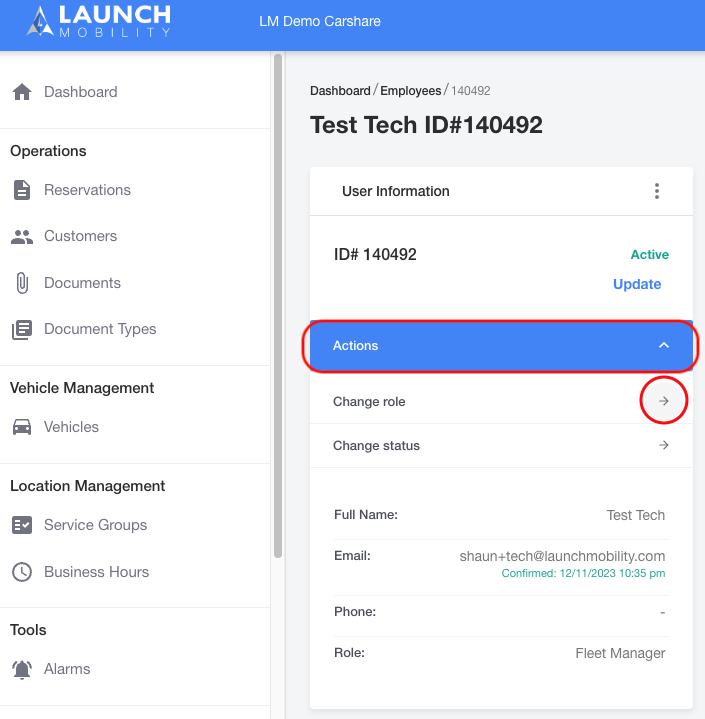
- Once the new employee is created they can be assigned to any non-customer role permissions. To change an employee's permissions open their profile page. Once on the employee’s detail page tap and expand the Actions dropdown to reveal the Change Role options. Select the arrow to the right of "Change Role" and follow the prompts to change the role of the employee.
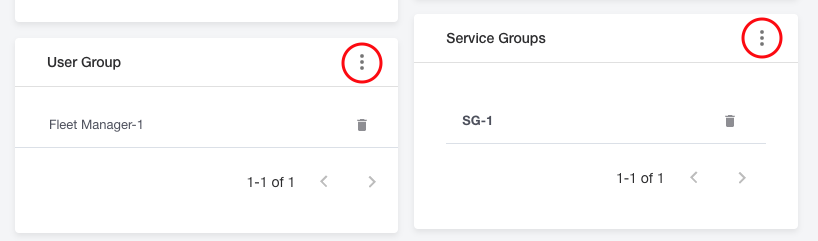
- For employees who are not assigned with admin role permissions, they will need to be associated with the Service Groups for which vehicles they have visibility into. Both User Groups and Service Groups can be managed from the respective employee’s detail screen. Tap the hamburger menu in each widget and follow the prompts to add the employee to User Groups and Service Groups.
Note: Setting up User Groups in situations like this can help you reduce the amount of manual work that needs to be done. Any updates made to User Groups (granting or removing access to Service Groups) will automatically be updated for any member of that User Group. Updating permissions can always be done manually by updating information in the Service Group section.
Note: A user's Service Group access will always be displayed in the service group section. Regardless if that access was granted by their User Group or manually by their Service Group.
Sign in as a technician
Now that the employee has been created, and the proper access/visibility to vehicles established, we will view things from the technician's perspective. We will walk through the process of creating a reservation in the Technicians App.
- Download the customer-facing app for your service from your device’s respective app store.
- Sign in to your account using the email that was used to set up your employee account and the password you created after being prompted by the email.
Note: If your service has multifactor authentication enabled, the technician will be prompted to then enter a 6 digit code before entering the app.
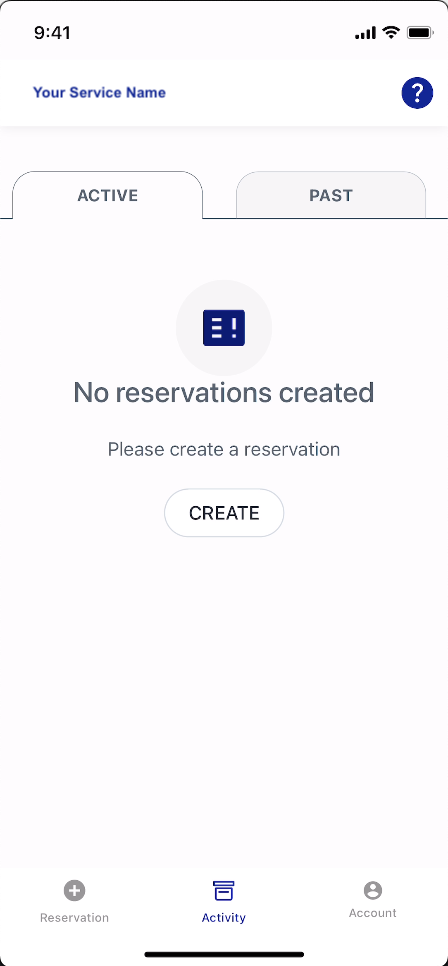
- The technician will be presented with the Activity page which will allow them to:
- View and update any current reservations;
- Create a new reservation;
- View a history of their reservations;
- Access their profile information.
Note: If a technician has access to multiple services, they will be prompted to select the service that they want to access. A drop down menu will be located at the top of the screen. A technician can always switch between services once they are in the app by select a service from this menu.
Creating a Reservation
In order to create a new reservation, the technician can either select "Create" or select the "Reservation" icon in the footer navigation bar. The technician will need to Search for a vehicle in order to create a reservation for that vehicle.
- Technicians Search screen - is used by the technician to search for a specific vehicle or browse all vehicles that are accessible. Complete entries are not required in the search fields. Partial entries can be used to filter the results.
- If no information is known about the vehicle or the technician wants to see a list of ALL available vehicles, then they would just need to keep the search fields blank and select "Search".

Note: The technician can only view vehicles that are within 100km (62.1mi) of their access device’s current location.
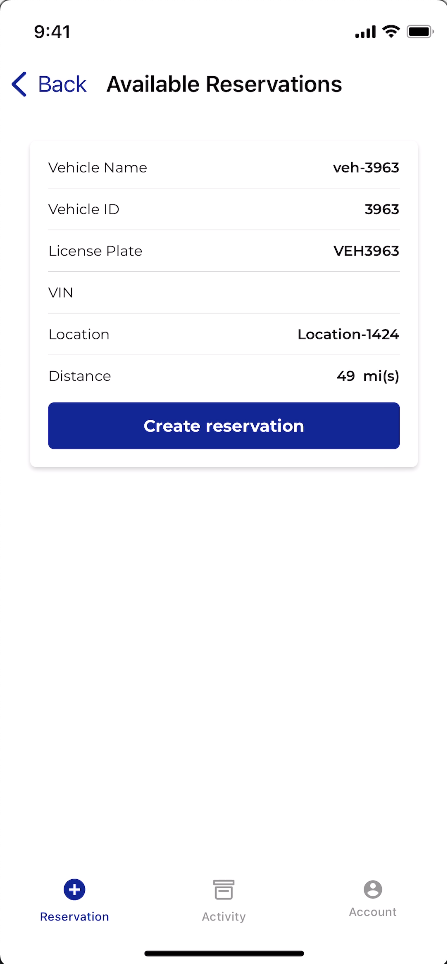
- Availability screen - Once a search is completed, the available vehicles are presented as cards with the following identifiers:
- Vehicle name
- Vehicle ID
- License Plate
- VIN
- Location
- Distance - current distance from the technician
- To Create a reservation, the technician will select the "Create Reservation" button for the respective vehicle.
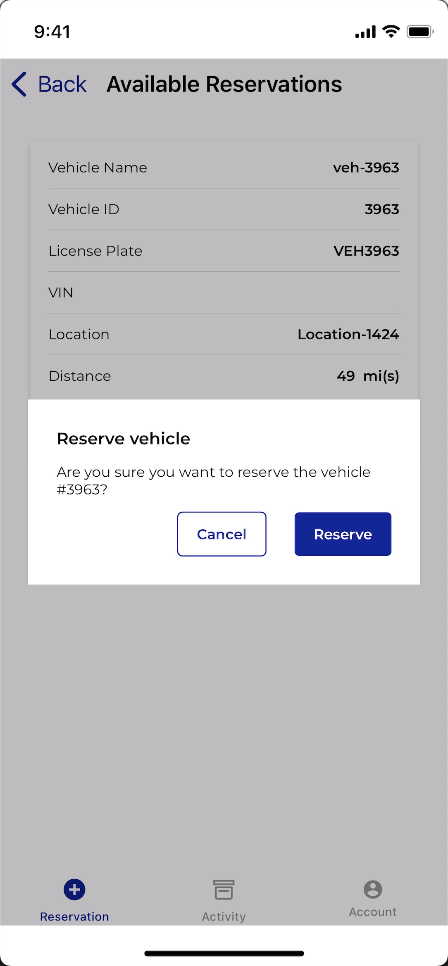
A confirmation overlay will be presented to the technician and a reservation will be created once "Reserve" is selected.
- A reservation created using the Technicians App will use the current time at which the user makes the request as the starting point, and applies the default duration for the Non-Customer reservation ruleset.
Check-in to a reservation
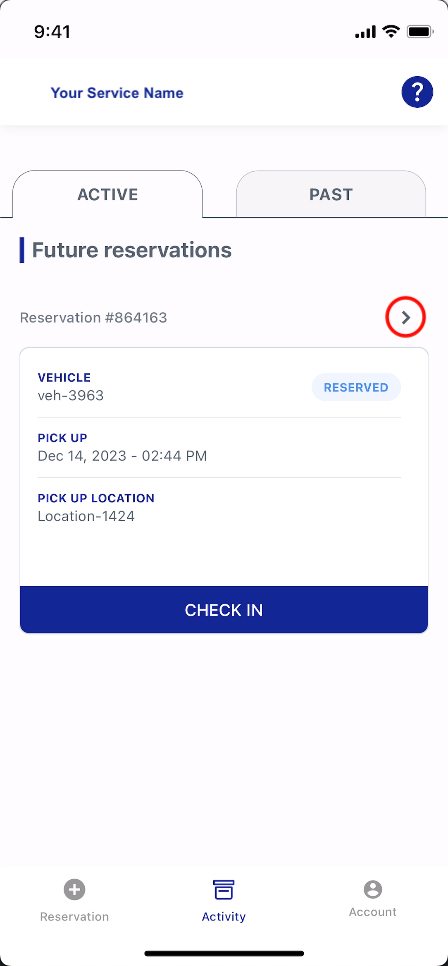
Once a vehicle is reserved, the technician will have the option to either view or edit their reservation or immediately check in to the vehicle. To view and/or edit your reservation's information select the arrow to the right of your reservation number, circled below. If "Check In" is selected, your reservation will begin immediately and the status of the reservation will change from "Reserved" to "In Progress".
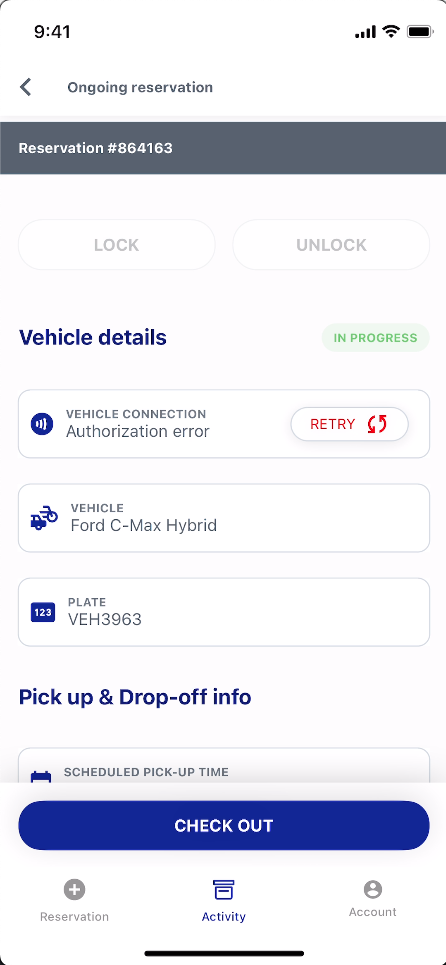
Once the reservation is In Progress, select the arrow to the right of your reservation number in order to view the Ongoing Reservation screen. This will allow the technician to:
- Connect to Vehicle - if the technician is within 20 feet of the vehicle, they will be able to connect to the vehicle. Connecting to the vehicle will establish the Bluetooth pairing process with the vehicle. If that is successful, then the “Lock” and “Unlock” options will be displayed.
- Edit Reservation - edit the scheduled drop-off time for the vehicle.
- Check-out of the vehicle and reservation
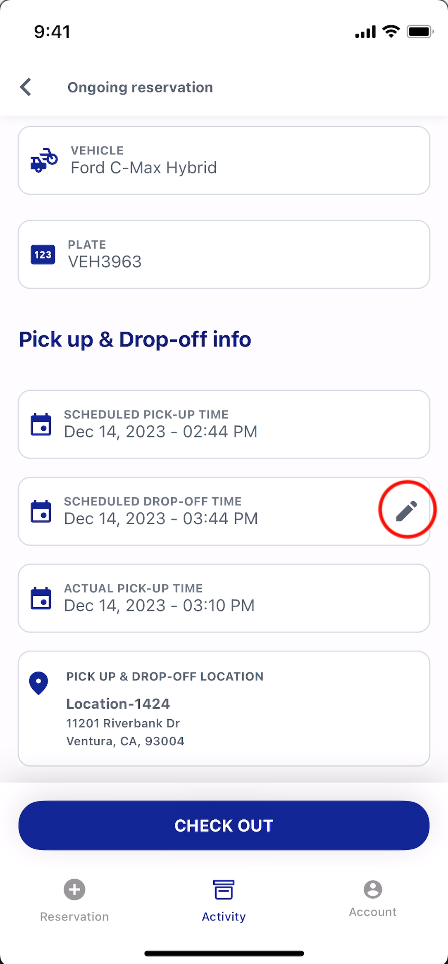
Edit a Reservation
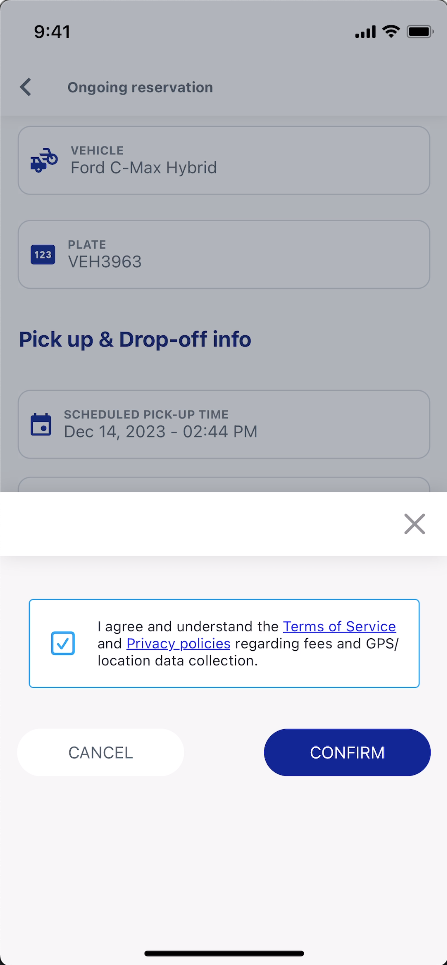
If a technician needs to adjust the end time for a reservation, then they need to select the Edit icon on the right hand side of the "Scheduled Drop-Off Time" section.
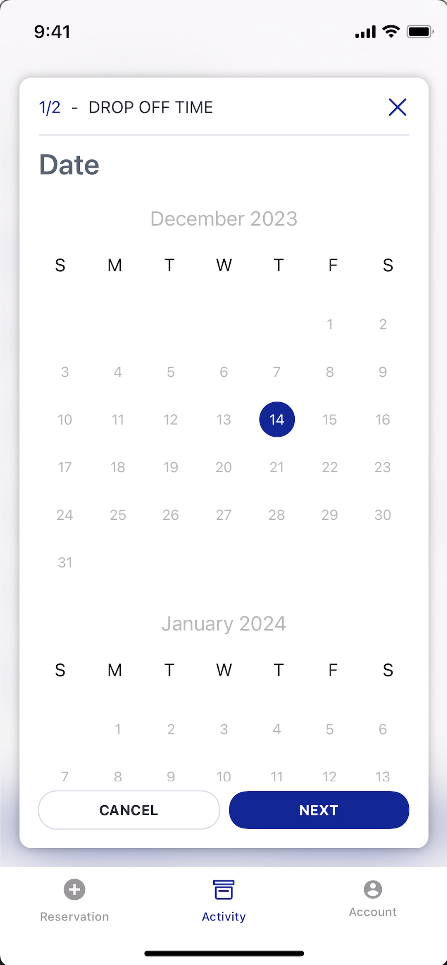
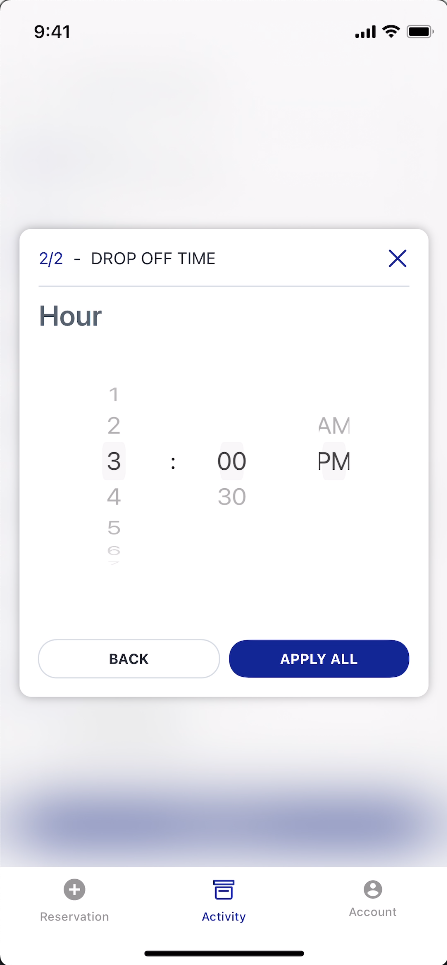
The end date and time can be adjusted by:
- Selecting the date using the calendar picker
- Selecting the time using the time wheel
After this is done, select "Apply All". A pop up will appear asking the tech to agree to terms of service. Check the box and select "Confirm".
End a Reservation / Check-Out
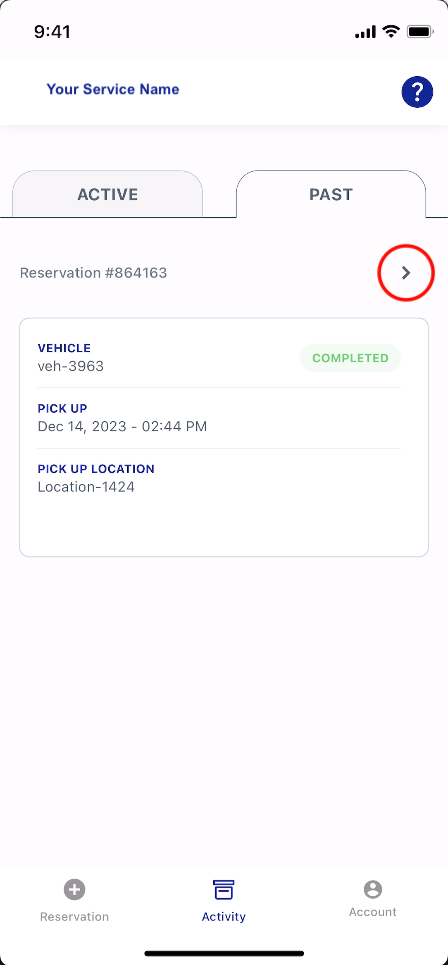
Once a technician is done servicing a vehicle, they can select "Check Out" to end the reservation. The reservation will now be listed in the "Past" tab on the Activity screen. It's details can be viewed by selecting the arrow to the right of the reservation number.