-1.png?width=200&height=51&name=LM_NuBlu_Horiz_Hi%20(1)-1.png)
Mission Control allows you to analyze data within specific time periods. This article will guide you through two ways to set the timeframe for your reports:
Creating a New Report with a Specific Timeframe:
- Navigate to Reports: Begin by clicking on the Reporting tab in Mission Control.
- Create Your Report: Click the "Create a report" button to initiate building your report.
- Customize Your Report: Add the desired columns and filters to tailor your report to your specific needs.
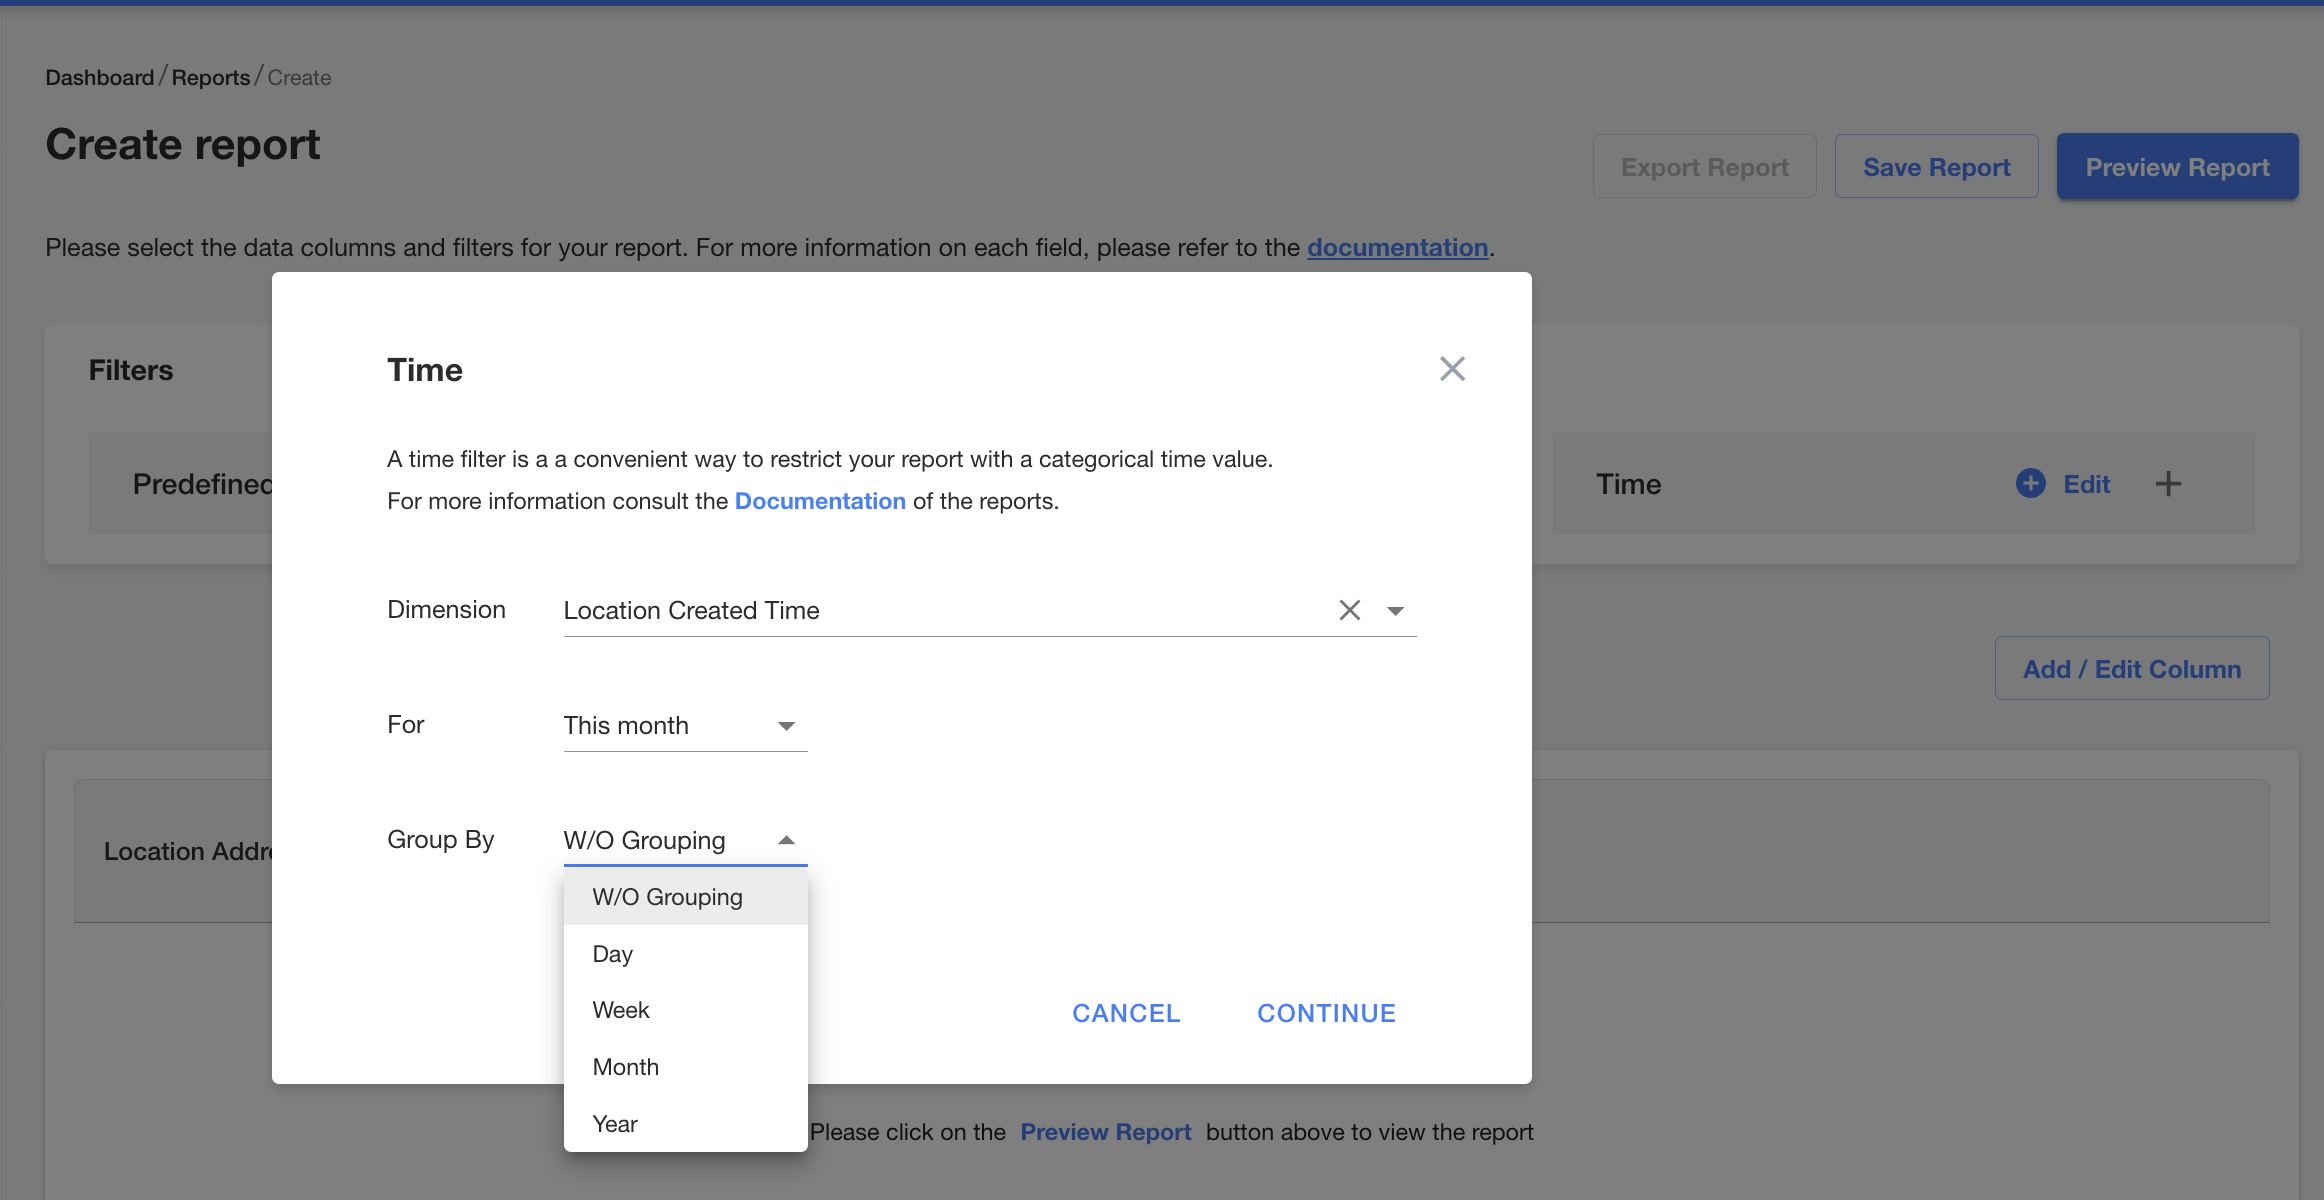
- Set the Timeframe: Locate the "TIME" column. Click the "edit" option next to it. This opens the timeframe selection window.

- Refine Your Timeframe: Within the window, you have three key options to define your timeframe:
- Dimension: This determines the level of granularity for your time periods (e.g., Day, Week, Month, Year).
- Timeframe: Choose the specific period you want to analyze (e.g., Last 7 Days, Last Month, Year to Date).
- Grouping Preference: Select how you want your data grouped within the chosen timeframe (e.g., Daily, Weekly, Monthly).
- Save Your Work: Once you've set your desired timeframe and any other report customizations, click the "Save" button to preserve your report.
Editing the Timeframe of an Existing Report:
- Locate Your Report: Find the report you want to modify within the reporting section of Mission Control.
- Edit the Timeframe: Click the "edit" button displayed in the "Time" section of your chosen report.
- Refine the Timeframe: Similar to creating a new report, use the editing window to adjust the Dimension, Timeframe, and Grouping Preference.
- Save Your Changes: Don't forget to click "Save" after making your edits to ensure the timeframe updates are reflected in your report.
By following these steps, you can easily control the timeframe for your Mission Control reports, allowing you to analyze data for the specific periods relevant to your needs. Remember, saving your report is crucial to ensure your timeframe selections and other customizations are applied.
If you have any questions about creating or editing your report, please contact your Launch Mobility Account Manager for assistance.