-1.png?width=200&height=51&name=LM_NuBlu_Horiz_Hi%20(1)-1.png)
What is a SKU?
SKUs (Stock Keeping Units) are the fundamental products or services you bill for in the Launch Mobility platform. They must be associated with a pricing element to function. There are two types of SKUs in Mission Control:
- Revenue SKUs: Represent charges to your customers. For example: mileage rate (
$/mile), hourly rate ($/hr), or a subscription fee ($/month). - Expense SKUs: Represent credits or discounts applied to a customer's account or invoice. For example: referral credit, promotional discount, or a service credit.
This guide will walk you through creating a new SKU and managing existing ones.
Creating a New SKU
Follow these steps to set up a new SKU in Mission Control.
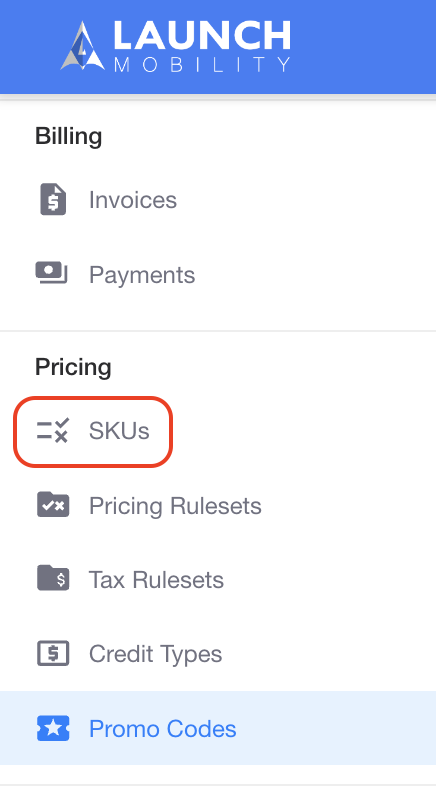
1. Navigate to SKUs
In Mission Control, ensure you are in Service View. In the left-hand navigation menu, in the Pricing section and select SKUs.
2. Initiate SKU Creation
Click the Create A New SKU button in the top-right corner.

3. Choose SKU Type
Select either Revenue or Expense.
- Revenue: For items that charge a customer.
- Expense: For items that give a customer a discount or credit.
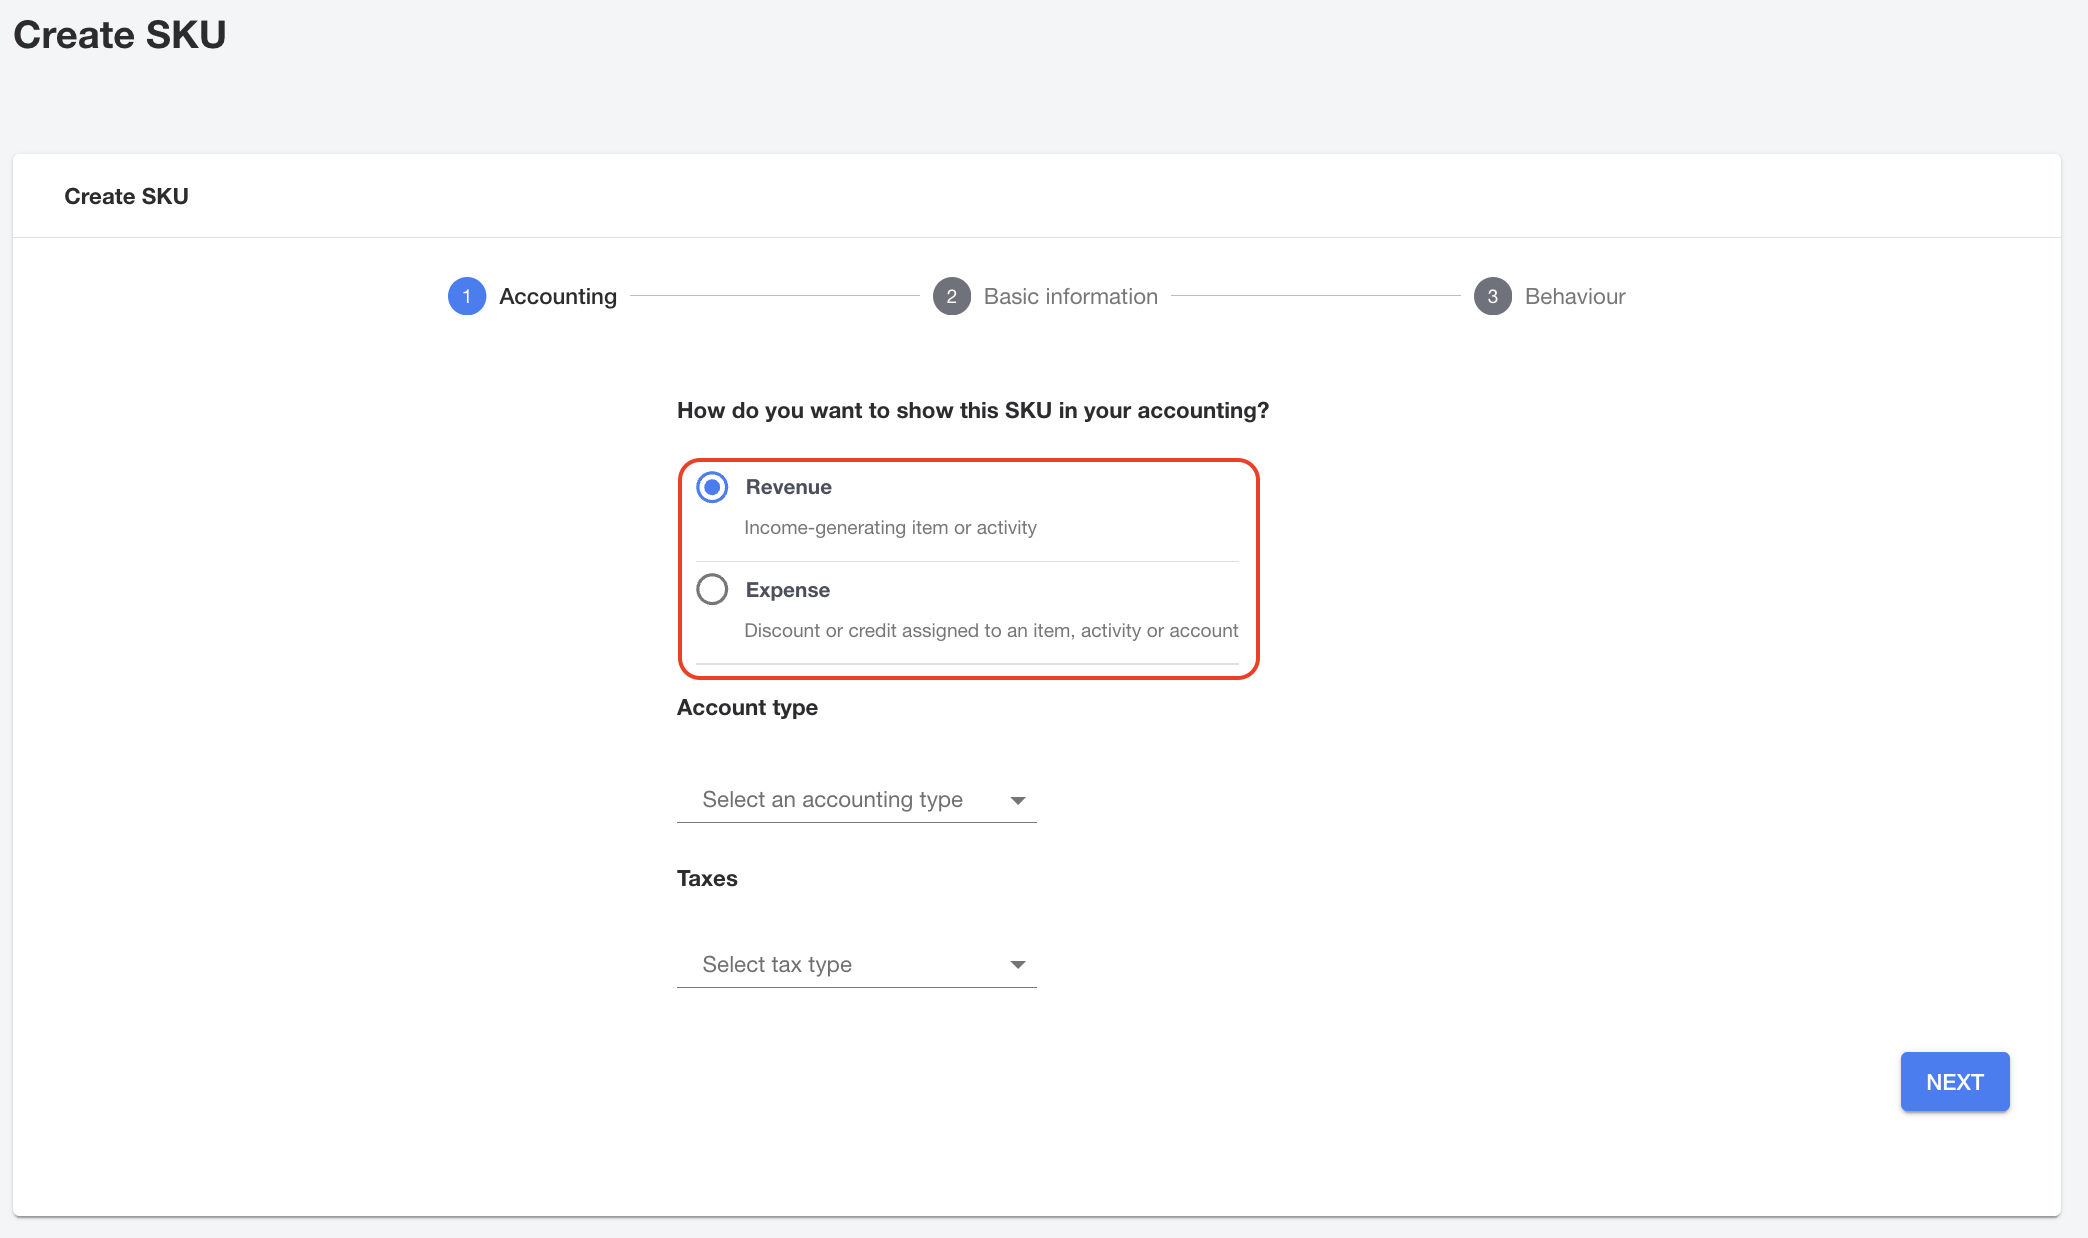
4. Select Account Type
Choose the Account Type that best fits the purpose of your SKU. This helps categorize line items on invoices for accounting and reporting purposes.
5. For Revenue SKUs, select Tax type.
Tax types explained:
| Use Default | For SKUs that have a set tax, enter default tax rate in as a decimal. | | ---| --- | | Tax Exempt | Tax is set to 0%. | | Use External | Sales tax by customer ZIP code; requires setup with TaxJar or similar service. | | Use Per Location | Allows you to assign a tax ruleset with location-based tax rules to this SKU |
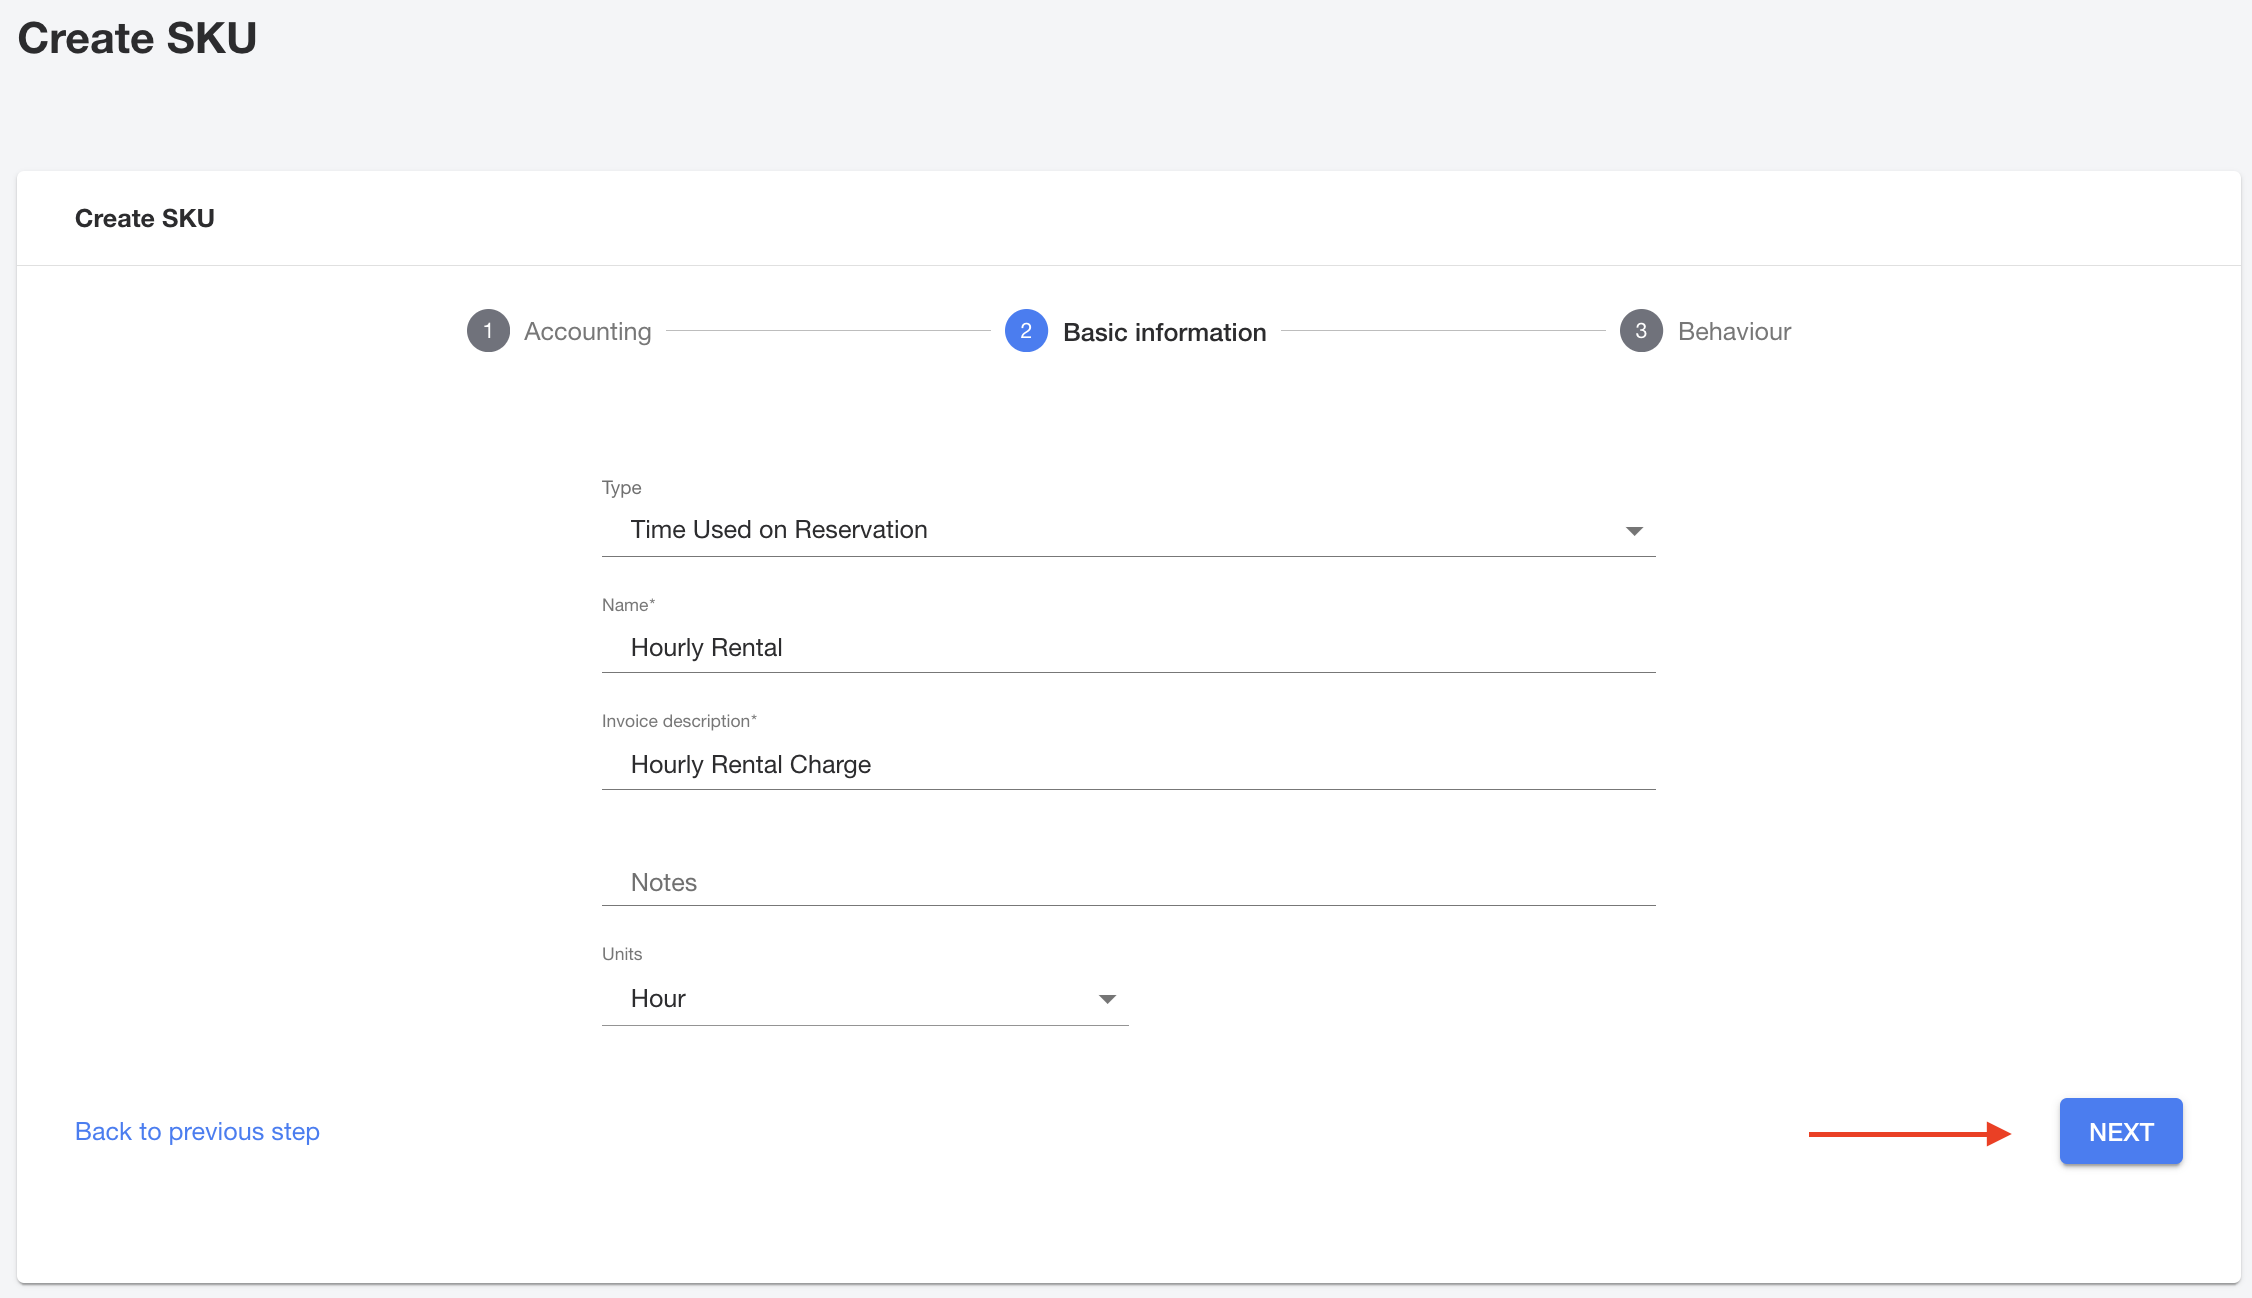
6. Select “Next”
7. On the Basic Information screen complete the fields. Select type, give your new SKU a name so you can recognize it, and then add a description that will help customers understand why they are seeing that revenue or credit. Be sure to set the correct unit of measurement. Once you complete the fields, then click on the “Next” button.
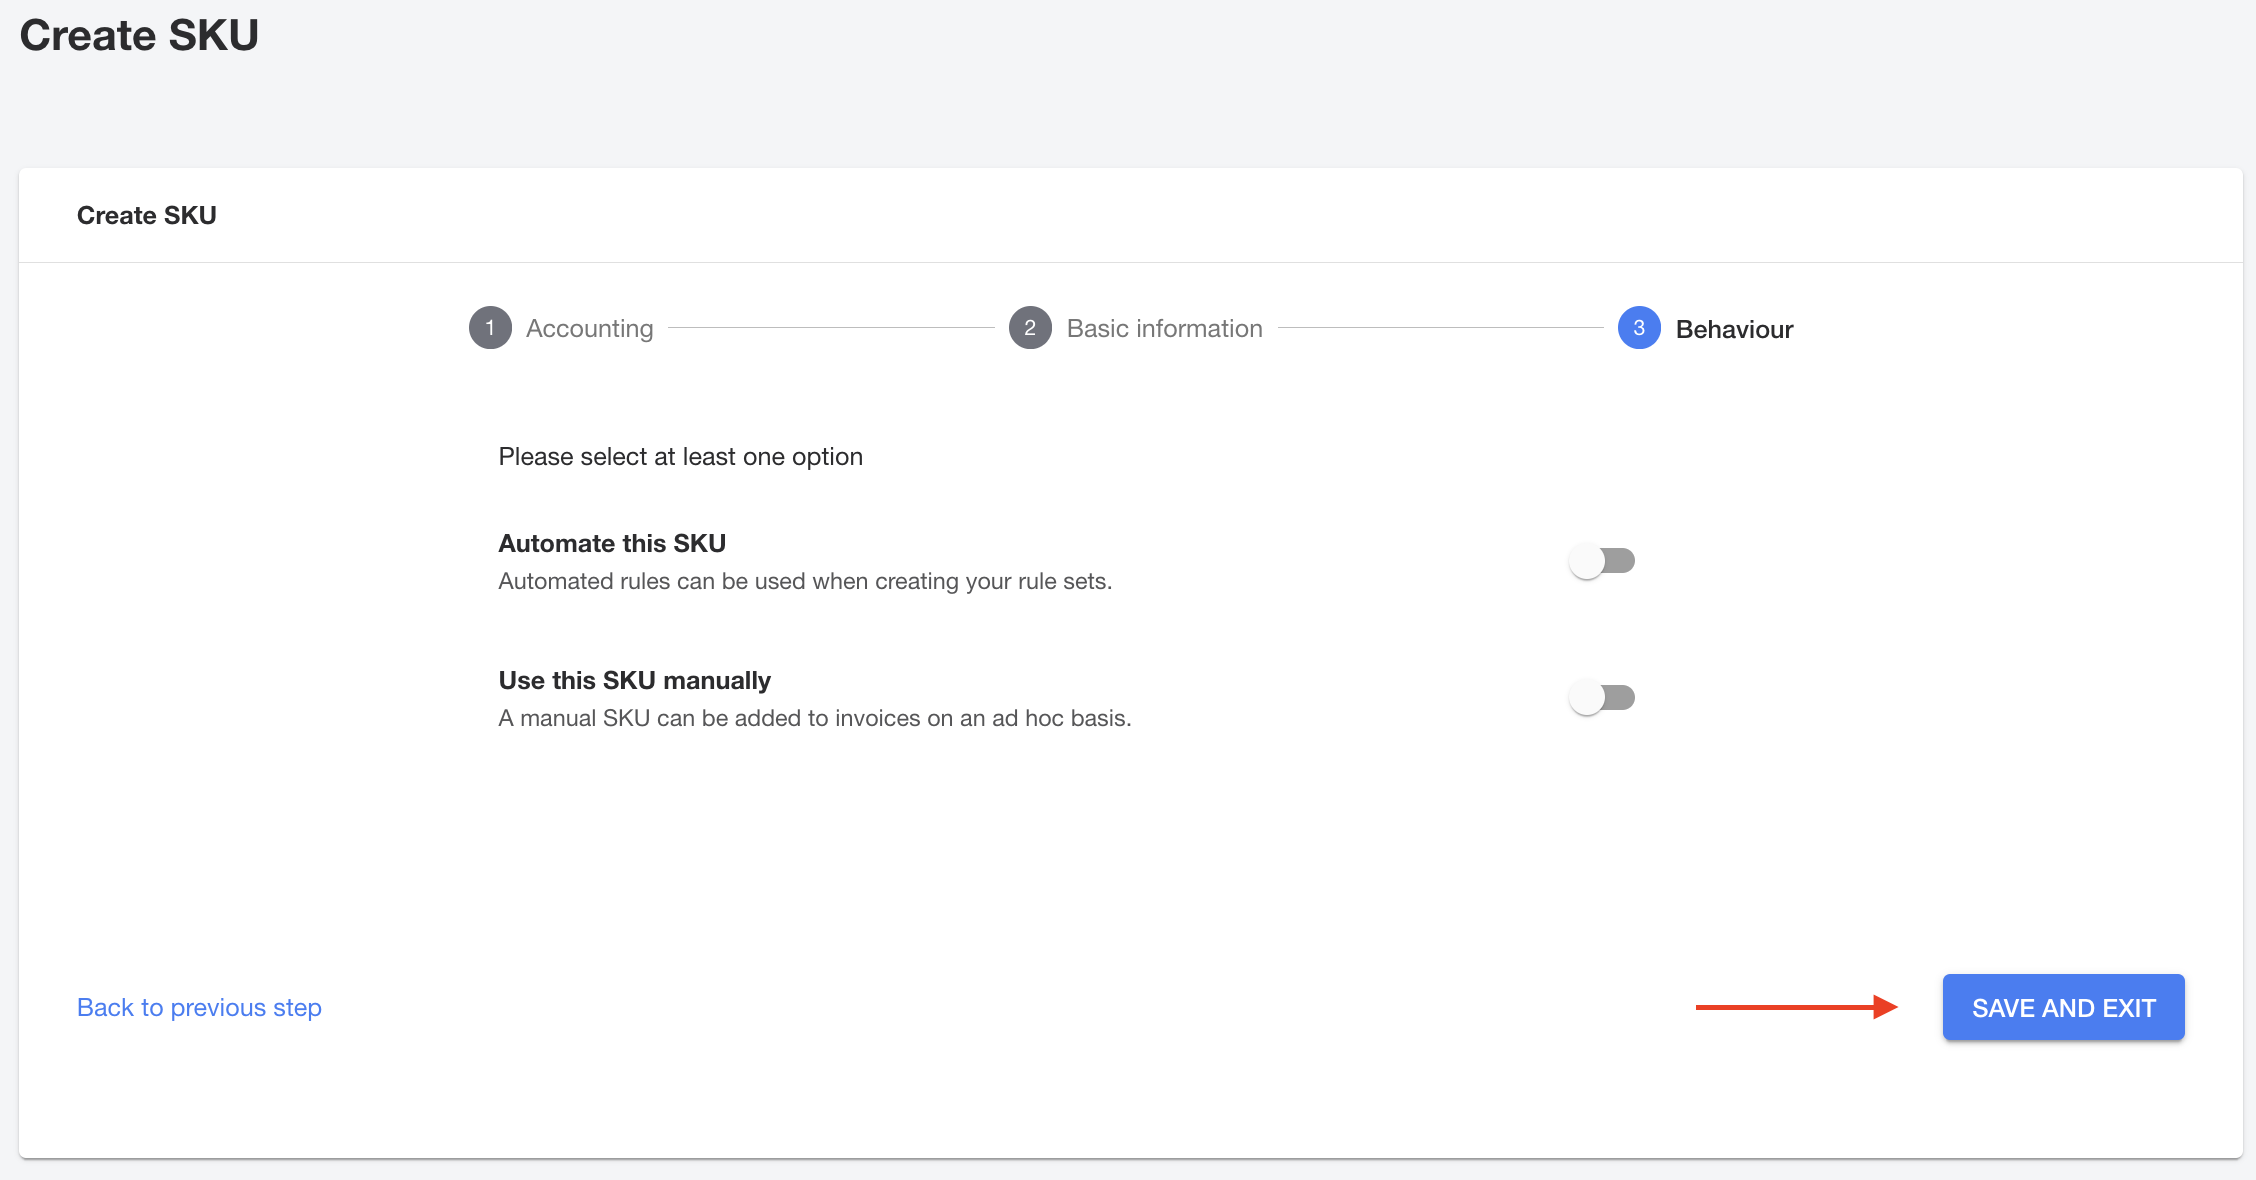
8. On the final screen, you'll decide how your new SKU will be applied. You have two choices:
-
Automate this SKU: We recommend this option for most SKUs. Selecting this allows your new SKU to be used in Pricing Rulesets. This is perfect for charges that you want to apply automatically, like hourly rates. Think of it as a "set it and forget it" option for your standard pricing.
-
Use this SKU manually: This option is great for one-time, unique situations. It allows you to add the SKU to an invoice on an as-needed basis. For example, you might use this for a specific fee, like a cleaning fee or a fuel surcharge.
Once you've made your selection, just click “Save and exit”.
Note: Once a SKU has been created and used on an invoice you are unable to edit that SKU.
How to edit a existing SKU
1. Navigate to SKUs
In Mission Control make sure you are in Service View. In the left-hand navigation menu, find the Pricing section and select SKUs. This will take you to a list of all your active SKUs.

2. Select the SKU
From the list, click the name of the SKU you want to edit. This will open the SKU Details page.

3. Update Tax Information
On the SKU Details page, find the Basic Information widget. Click the Update Information button.

A new window will appear. Here, you will find a Tax Type field with a dropdown menu. Select "Use default."
A new field called Default Tax Rate will appear. Enter the tax value as a decimal number (e.g., for a 5% tax rate, enter 0.05).

After entering the tax rate, click the Update button at the bottom of the window to save your changes. The tax value is now successfully applied to your SKU.
Congratulations, your new SKU is all set up and ready to go! Now you can head over to our article on how to Create a Pricing Ruleset to put your automated SKUs into action.